Latest Posts
-
Project Mini Rack
Homelab
Homelab / ˈhoʊm.læb /
noun- A personal IT environment where individuals can experiment, learn and test various technologies.
- A server (or multiple) in your home where you host applications and virtualized systems for testing and development or for home and personal usage.
-
Deniable Encryption
I remember years ago when I first made a bootable Kali thumb drive (‘BackTrack’ back then) with encrypted peristence there was an option to create a sort of “self destruct” where if you typed a special password the drive would be erased rather than unlocked. Kali still offers this package: cryptsetup-nuke-password.
For some reason this ability still fascinates me. The option to self desctruct your stuff at a moment’s notice. I’ve always used Luks encryption on Linux devices but this specific “nuke password” setup doesn’t seem to exist much outside of Kali.
I continued reading and doing some experimenting on an older laptop and eventually decided to set my Framework 13 laptop up with deniable encryption. -
Small Modules Part 2
Natural Language Passphrases
Previously I talked about making small modules as an excuse to practice making tools and focus on making something that works well. I ended by saying I might try turning my ‘New-NaturalLanguagePassword Script’ in to a module.
I followed through on this not long after making that post with the first version being published in March and the most recent version being from May. If you want to skip right to checking it out I invite you to visit the Github page for it: ‘PSPhrase’
I wanted it to work on PowerShell v5.1 or newer, as well as Windows, Linux or Mac. I also wanted to leverage the ‘Sampler Module’ for the development.The Checklist
The first thing I like to do before I even open an IDE is to write down the goals for what this thing will do.
- Retain all existing configuration options from the script
- Store word lists outside of the ps1 files
- Allow for saving parameters/values as 'configuration'
It would be easy enough to retain all of the existing parameters from the script as I already wrote them. In the script the adjective and noun wordlists are stored directly in the script as a hashtable with numbers as keys corresponding to dice rolls. This is an artifact of originally being based on diceware passwords. Since I’m doing my own thing now I decided that words can just be stored in simple text files with one word per line. This simplifies maintaining the wordlists and doesn’t constrain us to number ranges that align with 6 sided dice rolls.
Lastly, I wanted the end user to be able to save parameters and values as their default preference and have it persist between sessions. I know that ‘Paramter Default Values’ exist but I wanted to tailor this specifically for use with the module.What’s In a Name?

After listening to James Brundage talk about how important a good name/branding is for a module at the ‘24’ PowerShell Summit I really like to start with that. The script name is very long and quite literal. This module would be generating passwords. Not just passwords, but passphrases specifically. I like the idea of trying to incorporate ‘PS’ in to the name of the module if it works and it didn’t take very long to think of ‘PSPhrase’. This would mean I could name the primary functionGet-PSPhrase. That’s a lot easier to type thanNew-NaturalLanguagePassword. -
Small Modules
Size Doesn’t Matter
When I made my first PowerShell module it was mostly an experiment to see if I could understand how they worked. It was simply
tools.psm1and it lived in$HOME\Documents\PowerShell\Modules\Tools. That was all it took to move some function definitions out of my $Profile and in to a place where they would automatically load when called.
This would later grow in to a bigger collection of daily use functions for me and my team. I think at its peak there were around 44 functions, a couple of class definitions, and a few format files. Some of the modules you may be familiar with (e.g. ImportExcel, Posh-SSH, PowerCLI) can have upwards of 70 public functions. These modules represent tremendous effort and provide huge value to the greater PowerShell community. But not every module needs to be a monolith of code.Something that Kevin Marquette wrote about in his blog that I found very enouraging was the concept of building “micro modules.” Just because a module exports 1 or 2 functions doesn’t mean that it’s not valuable.
What I really like about a module is the ability to package up PowerShell functions, and any requirements, in to something that’s easy to install and use from the CLI. You can define classes and format files to go along with your module and the process of getting the module doesn’t change one bit. I could write a script to accomplish a lot of the same end result but here’s my general philosphy on PowerShell code:- Cmdlets are used in the CLI interactively to perform tasks
- Custom functions are used in the CLI interactively to perform tasks. They expand on existing cmdlets or fill a more custom need.
- Scripts are an orchestration/automation tool used to perform a set of actions, sometimes unattended
- Modules are a deliverable way to install functions (and functionality) on to a system
Maybe you’ve written a logging function that you want to incorporate in to a bunch of scripts you’ve written that might run unattended. It could be just 40 lines of code or so, and you could include it at the top of all your scripts. Maybe it lives in a separate .ps1 file and you dot source it at script execution. By comparison the latter option would make it easier to write changes to your logging module. OR you turn your logging function in to a module and publish it in a repository. Now it’s installable on any machine that you need it on, and you can use built in cmdlets for module management like
Update-Moduleto handle changes.If you’re writing PowerShell functions, and you’re putting them in to modules, you’re making tools. If that tool happens to do one thing really well that sounds like a pretty good tool to me. I don’t need a screwdriver that’s also a flashlight, a radio, and a spatula. I need a screwdriver. Preferably one that’s so good I never have to think about it. Go ahead and turn that function, or two, in to a shippable module.
-
Quick Tip Invoke-History
The more time I spend living in the CLI the more I appreciate learning and adopting shorthand for operations. In Powershell the aliases for Where-Object and ForEach-Object have become second nature. Using up arrow to repeat the previous command and add more to it a near constant occurence. One situation I find myself in quite a bit however is running a command in Powershell, and then finding that based on the output I’d actually like to re-run that command an get the value from a property instead. On the keyboard I’ve been using for the past couple of years I would typically just hit up-arrow to repeat the last command,
Hometo put my cursor on the beginning of the line, type a(thenEnda closing)then use dot notation to call the property I wanted the value of.As an example let’s say I run a script and see what the output looks like:
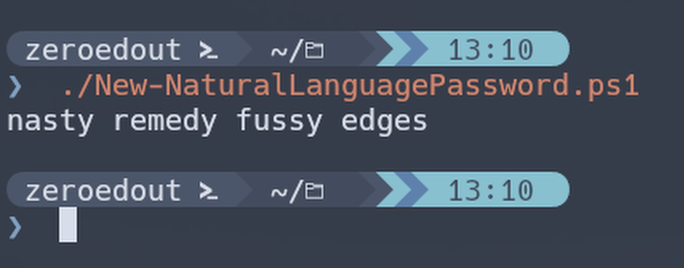
From this I observe the output and decide that I’d like to add some parameters. No problem, I’ll just up-arrow to repeat the command and add the parameters to the end:

Great, but if I wanted to call a property/method on that output object I’d either have to pipe it to another cmdlet or wrap it in parenthesis and then call the property I want with the dot shortcut. I.e.:

Seems simple enough. Home key, parenthesis, End key, parenthesis, dot, property name. But, my new keyboard is a 60% and doesn’t have dedicated arrow keys requiring that I hold another key to access a layer that has arrow keys on it.Invoke-History Has Entered the Chat
I remebered that along with Get-History there was Invoke-History and its alias of ‘r’. I’ve previously used this similarly to repeating commands in bash. Get-History, find the number of the command, then use
r <num>to repeat:
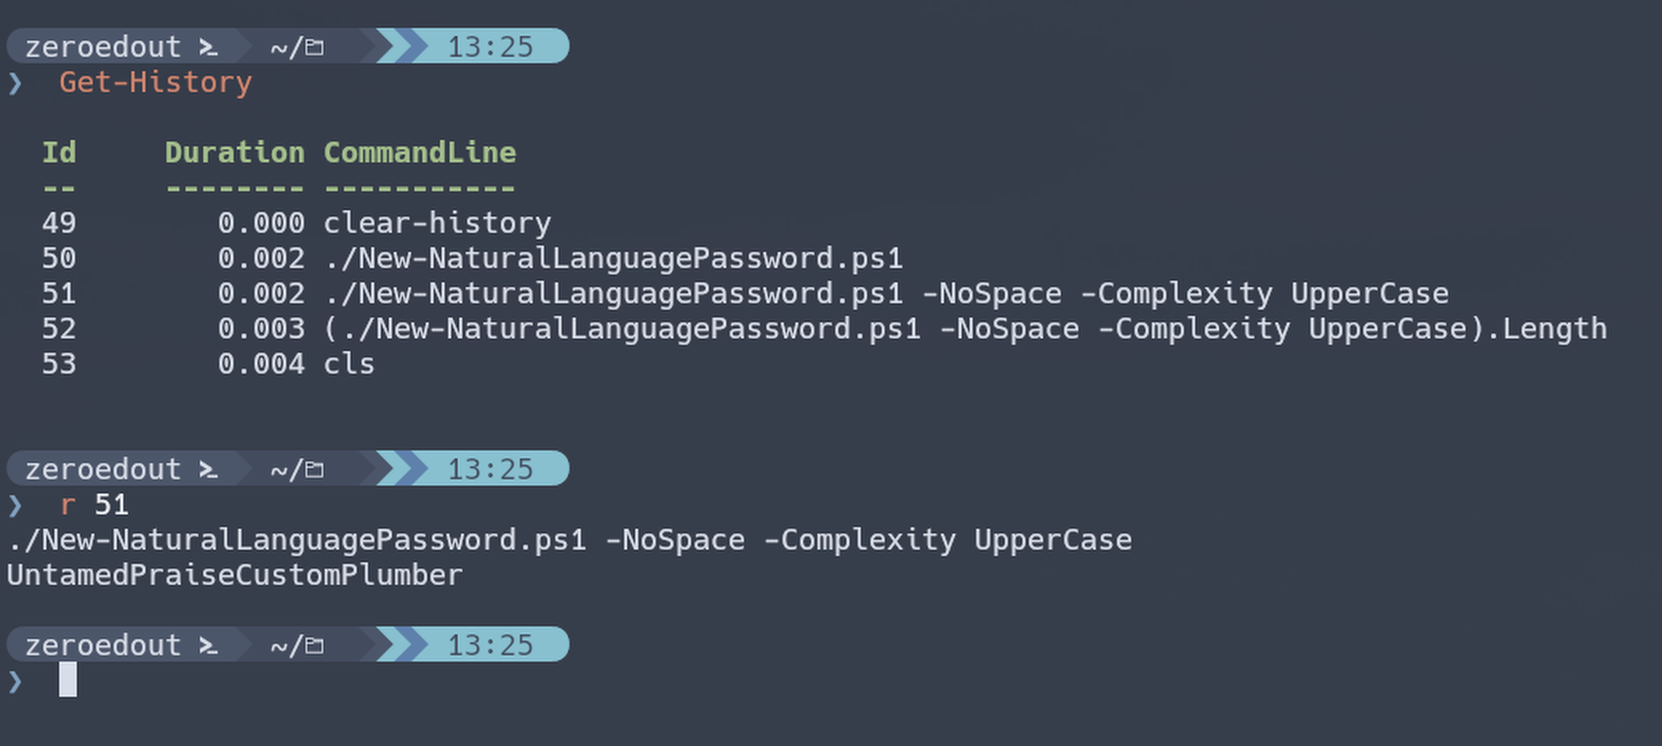
Through experimentation I found that callingrby itself repeats the previous command by default.
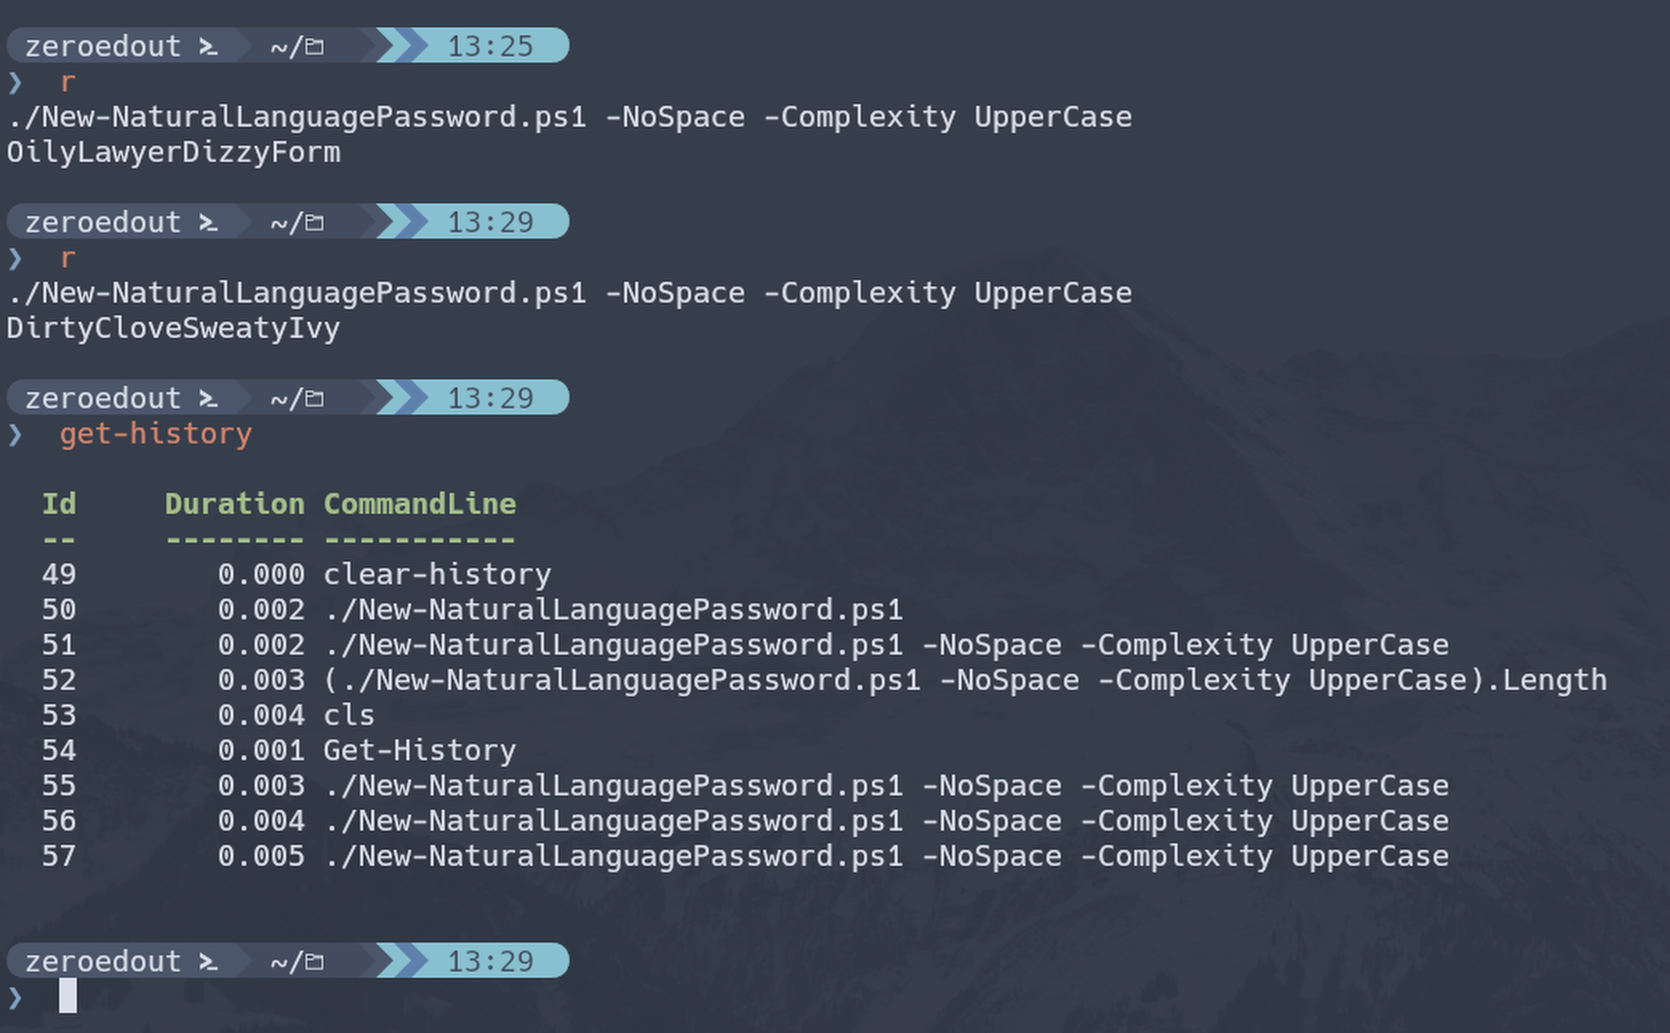
The next thing I tried was wrapping ‘r’ in an expression to see if I could then use the dot shortcut to retrieve a property or method:
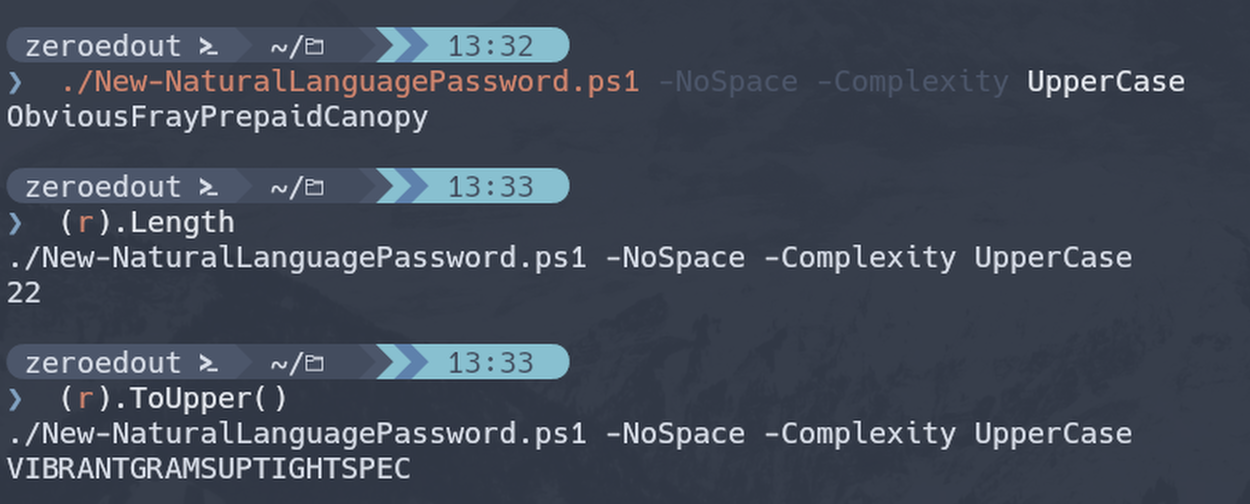
And shazam! Now instead of needing arrow keys or Home/End keys I can start from a fresh prompt and type(r)following by whatever it was I wanted to do on the previous operation.

-
Powershell Summit 2024
I got the opportunity this week to attend the 2024 Powershell Summit in Bellevue Washington. If you have an opportunity to go to this, whether you’re brand new to Powershell or a steely-eyed veteran, I highly recommend it.
Beyond the individual sessions and workshops, the conversations that are had throughout the day in hallways, at tables and even at dinner are invaluable. I am still a bit overwhelmed but I managed to spend some time since the conference updating my ProtectStrings module. I wanted to clean up some of the code and also update it to be cross platform. After the conference I no longer view Powershell as strictly a Windows shell. Despite having Powershell 7.x installed on my Linux computer I still wrote most of my stuff on a Windows machine and never thought much about using it on Linux.
After what I saw at the conference I’ve got a renewed mindset focused on tool making and compatibility. I hope I get the chance to attend next year as well. -
SecretStore Module
SecretManagement module is a Powershell module intended to make it easier to store and retrieve secrets.
The secrets are stored in SecretManagement extension vaults. An extension vault is a PowerShell module that has been registered to SecretManagement, and exports five module functions required by SecretManagement. An extension vault can store secrets locally or remotely. Extension vaults are registered to the current logged in user context, and will be available only to that user (unless also registered to other users).
SecretManagement Module on Github
This is a really cool project and an awesome tool that Microsoft created. I see it get referred to a lot in different Powershell communities as a recommended solution for dealing with secrets in automation. I haven’t had any occasion to use it myself but I had often thought about writing a Powershell based password manager (until SecretManagement was released).
Relevant to my interests then if you want to just store secrets locally on your computer for use in scripts you’ll want to look at the SecretStore module.
SecretStore Module on GithubIt stores secrets locally on file for the current user account context, and uses .NET crypto APIs to encrypt file contents. Secrets remain encrypted in-memory, and are only decrypted when retrieved and passed to the user. This module works over all supported PowerShell platforms on Windows, Linux, and macOS.
Since theirs is cross platform and mine isn’t it’s probably different .NET in the backend, but the class is likely the same. For reference, in .NET it’s referred to by its RFC “Rfc2898DeriveBytes”. Since this is all publicly available on Github I thought I would search through the relevant CS code and try to understand how they did it differently. Here is the file I found where I believe PBKDF2 is happening:
Utils.csThere’s two sections that drew my attention. The first:
private static byte[] DeriveKeyFromPassword(
    byte[] passwordData,
    int keyLength)
{
    try
    {
        using (var derivedBytes = new Rfc2898DeriveBytes(
            password: passwordData,
            salt: salt,
            iterations: 1000))
        {
            return derivedBytes.GetBytes(keyLength);
        }
    }
    finally
    {
        ZeroOutData(passwordData);
    }
}
And the second:
-
Reset Expiration Clock
With more and more people working remotely there’s been a huge uptick in VPN usage. A lot of organizations have had to completely rethink some of their previous IT policies and procedures. Some things that used to be simple are now slightly more complicated.
One thing I wasn’t aware of, being so far removed from front line customer support at work, was that a lot of our user’s passwords were expiring while they were working remote. With an expired password, they couldn’t connect to the VPN, and without connecting to the VPN they couldn’t update their password. Unfortunately self-service password reset is not within our control because that’s the obvious answer. In some cases users were being told to come in to the nearest office so they could sign in to their computer on network, and then update their password. In other cases the help desk was resetting their password and dictating it to them over the phone. But, more often than not the help desk was asking for the user’s current password, and resetting it in AD to that. Obviously this is all really bad (especially that last one), but there wasn’t an available solution to stop this from happening. I read that there was a way with Powershell to essentially reset the password expiration clock on a user account to push the date out. If your password expired yesterday, and the domain policy was a 90 day password, then “resetting” it would change your expiration date to 90 days from now. This would make the user’s currently configured password valid again and prevent any form of password sharing. Then the user could manually initiate a password change once they were up and running again.
The pwdLastSet Attribute
The pwdLastSet Attribute in Active Directory contains a record of the last time the account’s password was set. Here is the definition from Microsoft:
“The date and time that the password for this account was last changed. This value is stored as a large integer that represents the number of 100 nanosecond intervals since January 1, 1601 (UTC). If this value is set to 0 and the User-Account-Control attribute does not contain the UF_DONT_EXPIRE_PASSWD flag, then the user must set the password at the next logon.”
There’s also the PasswordLastSet attribute which is just the pwdLastSet attribute but converted in to a DateTime object which is a lot more readable. But, if you want to make a change directly to an account’s Password Last Set it’s done via the pwdLastSet attribute. Knowing that it’s stored as a large integer number representing “file time” is important when we start making changes to it.
Updating the Attribute
Making changes to an Active Directory user account is often done with Set-ADUser and this is no different. If you look at the help info for Set-ADUser we can see that there are a lot of parameters representing attributes/properties we can change. The pwdLastSet attribute isn’t on the list however. There are plenty of forum hits and examples that reveal that the parameter we need to use is -Replace. The -Replace parameter accepts a hashtable as value so the syntax is pretty straight forward: The property name you want to update, and the value you want to replace it with.
Whether a user account’s password is expired or not, if you replace the pwdLastSet value with a 0 it effectively expires their password immediately. We’re clearing the slate here. The next step seems odd but we replace the pwdLastSet value with a -1. Since this is stored as a large integer value we’re telling it to set it to the largest number that can be stored in a large integer value. This would be some insane date out in the future except that it uses the domain password policy and caps it out at the default max password age. If that’s 90 days for example, then setting it to -1 puts the expiration date as 90 days out in the future from the execution of the command. The general consensus online is that both of these steps need to be taken: set it to 0, then -1. I haven’t done a deep dive on why, but if anyone has an explanation feel free to hit me up.
The Script
Seems simple enough then right? The script just needs to set the pwdLastSet attribute for a given user to 0 and then -1. One of the things I always ask when I’m writing Powershell for someone else’s consumption is “how” they want to be able to use this. Do they want to manually launch Powershell and execute the script by calling out its path? Do they want to be able to double-click a shortcut and have the script execute? Do they just want a function they can run as a CLI tool in Powershell?
In our case the help desk doesn’t spend a lot of time with Powershell and would prefer to just double-click a shortcut. I on the other hand prefer to run Powershell scripts from an open Powershell session, so I figured I would accommodate both.At its simplest the script really just needs to do this:
$User = Read-Host -Prompt "Enter username you wish to reset"
Set-ADUser -Identity $User -Replace @{pwdLastSet = 0}
Set-ADUser -Identity $User -Replace @{pwdLastSet = -1}
However, I wanted the script to have some sanity checks, provide before and after info regarding the account’s password expiration, allow for alternate credential use and to run in a loop in case there were multiple accounts to target. I also wanted it to support running as the target of a shortcut, as well as an interactive script for users that would prefer to do it that way.
Script on Github -
Status Update
Hi all. Just wanted to provide a brief status update. It’s been a while since my last post and while I have been busy, and making frequent use of Powershell, I haven’t had anything novel that I felt like sharing.
I’ve still been using the Get-GeoLocation function quite a bit as well as another function I wrote called Get-WhoIsIP. It’s nothing crazy and primarily leverages “http://ipwho.is” API for results. I spend a lot of time using Powershell as a CLI and want a way to quickly look up IP addresses to determine ownership. Sometimes lots of IP addresses.
Primarily I would say that I’ve had a lot of occasion to help other people with their Powershell related needs. Here are some highlight topics I can think of:
- modified a Domain Join script to handle adding a computer to groups as part of the process.
- A script as part of a Scheduled Task that emails a CSV of specific types of accounts that need to change their password (based on age)
- A script for someone that needs to rename hundreds of files based on string text found within. Was previously a manual process, now thanks to Powershell (and Regex) something that used to take hours and hours each week takes a couple of seconds.
- A couple different Active Directory off-boarding scripts to consistently handle removing accounts.
- A script that resets an Active Directory user’s password expiry clock. Effectively changing the “Password Last Set” time to that of script execution.
- A series of scripts with Scheduled Task setups/executions, data output, and data collection. Heavily relying on DPAPI and AES encryption for data protection. The “psuedo code” is basically; execute script, save data, acquire data, alert on data. This also involves build scripts, deployment scripts, removal scripts and a few Scheduled Tasks. Was a lot of fun to write.
- Helped on a CTF that involved a lot of deobfuscating Powershell and finding flags within the code.
That’s about it. I’m still looking for the idea that’s going to inspire me to write another Powershell module. For now I’ll keep maintaining my team’s internal module, and my publicly available ProtectStrings module.
-
Get-GeoLocation
Getting GPS Coordinates From A Windows Machine
Since 2020 a lot of organizations have ended up with a more distributed workforce than they previously had. This means a lot of cloud services, VPNs, and company assets out in the wild. Some tools will let you build a “geo fence” around your infrastructure and block access to resources if the source is from a country other than your approved list. Let’s say you only have employees in the United States, you could specify in your cloud services that if anyone attempts to access your email from a country other than the United States, the authentication attempt would be refused.
This is generally accomplished through IP-based geolocation. We’ve all seen TV and movies where they get a person’s IP address and then magically pinpoint their location down to a couple of feet. In reality, that’s not true. If you want to see for yourself I used this website quite a bit during testing: IPlocation.net
The site will determine your apparent public IP address (note that a VPN could change this) and then get some publicly available information about the IP from a WHOis lookup. It will also query several Geo-IP databases and come up with GPS coordinates for your IP. Using the site above it comes up with a location that’s about 36 miles off. That’s certainly good enough to determine what country I am in, and maybe even what state I’m in, depending, but that’s about it. For preventing out-of-country login attempts that’s probably fine, but if I fire up NordVPN and specify Germany as my destination, IPlocation.net will now say I’m in Germany. That’s how most cloud destinations will view it as well.For the sake of argument, let’s say you work for an organization that allows remote work within the United States but you want to take a trip out of country and do some remote work. Maybe a VPN would be enough to convince all of your work resources that you were still in the United States and not throw any alarms. I wanted to more accurately determine a computer’s location and found that there really aren’t a lot of options out there, except for the Location Services that exist on most Windows computers. One good way to leverage this service is through Powershell and a .NET namespace.
GeoCoordinateWatcher
While searching the internet for how to get GPS coordinates out of a computer I kept running across the same code, or slight variations of it.
From StackOverflowAdd-Type -AssemblyName System.Device #Required to access System.Device.Location namespace $GeoWatcher = New-Object System.Device.Location.GeoCoordinateWatcher #Create the required object $GeoWatcher.Start() #Begin resolving current locaton while (($GeoWatcher.Status -ne 'Ready') -and ($GeoWatcher.Permission -ne 'Denied')) { Start-Sleep -Milliseconds 100 #Wait for discovery. } if ($GeoWatcher.Permission -eq 'Denied'){ Write-Error 'Access Denied for Location Information' } else { $GeoWatcher.Position.Location | Select Latitude,Longitude #Select the relevent results. }From Microsoft
# Time to see if we can get some location information

# Required to access System.Device.Location namespace

Add-Type -AssemblyName System.Device

# Create the required object

$GeoWatcher = New-Object System.Device.Location.GeoCoordinateWatcher

# Begin resolving current locaton

$GeoWatcher.Start()

while (($GeoWatcher.Status -ne 'Ready') -and ($GeoWatcher.Permission -ne 'Denied'))
{
#Wait for discovery

Start-Sleep -Seconds 15
}
#Select the relevent results.

$LocationArray = $GeoWatcher.Position.Location
From Github
function Get-GeoLocation{
	try {
	Add-Type -AssemblyName System.Device #Required to access System.Device.Location namespace

	$GeoWatcher = New-Object System.Device.Location.GeoCoordinateWatcher #Create the required object

	$GeoWatcher.Start() #Begin resolving current locaton


	while (($GeoWatcher.Status -ne 'Ready') -and ($GeoWatcher.Permission -ne 'Denied')) {
		Start-Sleep -Milliseconds 100 #Wait for discovery.

	}

	if ($GeoWatcher.Permission -eq 'Denied'){
		Write-Error 'Access Denied for Location Information'
	} else {
		$GL = $GeoWatcher.Position.Location | Select Latitude,Longitude #Select the relevent results.

		$GL = $GL -split " "
		$Lat = $GL[0].Substring(11) -replace ".$"
		$Lon = $GL[1].Substring(10) -replace ".$"
		return $Lat, $Lon


	}
	}
    # Write Error is just for troubleshooting

    catch {Write-Error "No coordinates found"
    return "No Coordinates found"
    -ErrorAction SilentlyContinue
    }

}

$Lat, $Lon = Get-GeoLocation
In my preferred editor (Visual Studio Code) I copied over some of these and started experimenting. It’s clear they’re using a .NET namespace “System.Device” in order to create an instance of a “GeoCoordinateWatcher” object. I looked this object class up so I could read more about it straight from Microsoft.
I always like stepping through code line by line when I’m writing it and exploring what properties and methods the objects I’m dealing with have. If we execute the first couple lines we’ve seen in all of these examples we’ll have an object we can play with:
Add-Type -AssemblyName System.Device
$GeoWatcher = New-Object System.Device.Location.GeoCoordinateWatcher
Then simply call the new object and just see what it says:

From this we can see that my “Permission” property is “Granted”, “Status” is “NoData” and “Position” looks like it contains some additional objects. I can infer from the code examples I pointed out that there must be some occasions where “Permission” is actually “Denied” but nobody seems to talk about that so for now I’ll just be thankful I’m not in that boat and move on. What’s in the “Position” property?
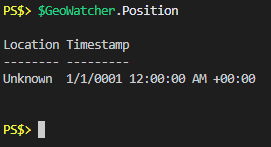
The next step seems like calling the “Start” method on the object.
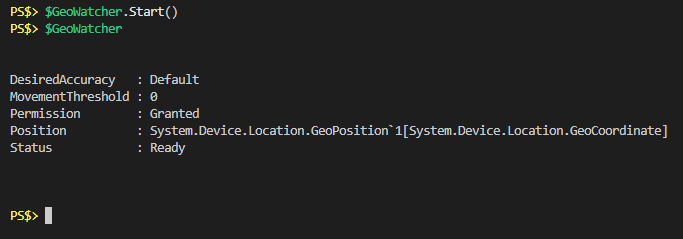
I only waited a second or two before calling the object again and as you can see the “Status” was “Ready” pretty quickly. If I look at the “Position” property again we see that it actually has value now:
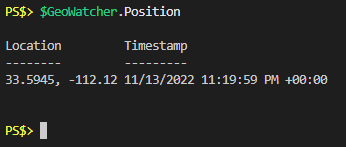
Wow, awesome. GPS coordinates and a timestamp. The GPS coordinates are returned in decimal degrees, which can be copy and pasted right in to Google maps to show you the location.Accuracy
Where is Location Services getting this information from? Well, it’s not 100% clear from just this object class alone. The “System.Device” namespace page has this to say about it:
Location information may come from multiple providers, such as GPS, Wi-Fi triangulation, and cell phone tower triangulation.I’ve read similar remarks on forums regarding this service, but that’s about as deep as it goes. Through my own testing it seems that if there are no radios (WiFi, GPS, Cellular) on the computer, it will do some type of geolocation look up based on the apparent public IP address. However, if even a USB WiFi dongle is plugged in the accuracy of the returned GPS coordinates can get as high as within a few yards. I haven’t gotten to test on a computer with a cellular card in it but I assume it would be similarly accurate.
String Manipulation: The Results
One thing I noticed in most of the examples of the code was that people were specifically calling the longitude and latitude of the “Position” property. Remember above that when calling the “Position” property it returned a location and a timestamp, and the location was shown as decimal degrees. Call the “Location” property of the “Position” property and you get a bigger picture:
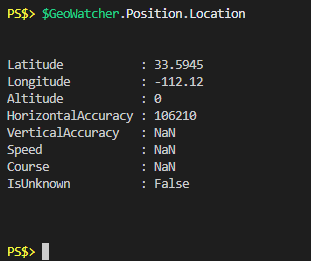
Now we can see that when viewing “Position” property there’s some object formatting taking place to show us the latitude and longitude as comma separated numbers. In actuality the “Location” property itself has 8 properties and we’re really only interested in the “Latitude” and “Longitude” ones. There’s examples out there of different ways to manipulate these to get what you want out of them, but I’m always a big fan of piping an object to Get-Member to see what’s available:
 I see a “ToString” method, I wonder what that looks like:

Great, I’m done. They did all the work for me and all those other examples out there of using Select-Object, or splitting, or whatever can be ignored.Permissions
One thing you see in every example is a reference to the “Permission” property possibly being listed as “Denied”. I was able to find a couple of computers where this was the case and wanted to understand what was controlling that and how I could possibly overcome it since no one seemed to talk about it in the posts surrounding the above code examples.
The short story is that it depends on whether or not Location Services is being allowed, at both the computer configuration and user configuration level. I make that distinction because there’s a registry key in both the LocalMachine and CurrentUser hive that applies to this. The path is here:Software\Microsoft\Windows\CurrentVersion\CapabilityAccessManager\ConsentStore\location\Value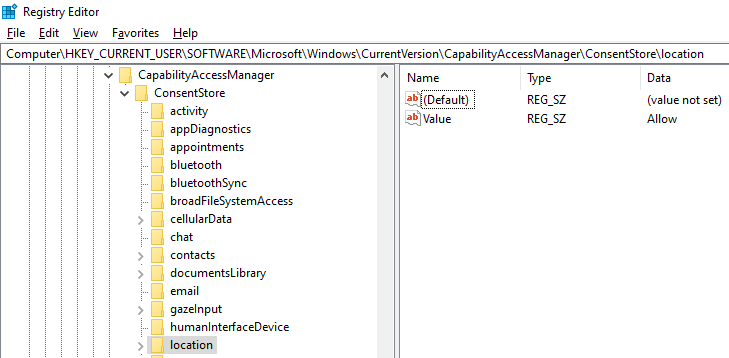
At the computer configuration level if this is set to “Deny” then Location Services won’t work and you’ll need admin rights to change that registry key. If the computer configuration is set to “Allow” but the current user configuration is set to “Deny” then the registry key can be changed without administrative privilege.
To show you what I mean, I’ve set my current user location registry key to “Deny” and recreated my GeoCoordinateWatcher object:
 As you can see the “Permission” property shows “Denied”. Calling the “Start” method on the object does not throw an error, and the “Status” property never changes from “NoData”.
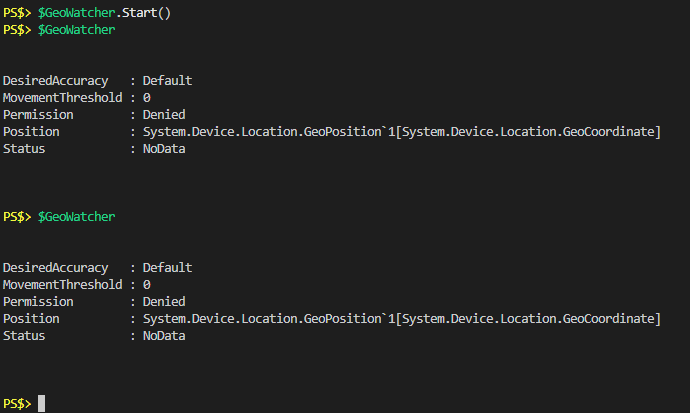
The while loop in all of the code examples is reliant on “Permission” being equal to something other than “Denied”, so in my current state the script would flow right through the while loop and move on, possibly writing some kind of error to host.What if instead we checked to see what the registry key’s value was before trying to start the process? Then if we have the appropriate permissions, change the value, do the work, and change it back when we’re done.
Let’s look at what I would do instead and then talk about it.Code
$IsAdmin = [Security.Principal.WindowsIdentity]::GetCurrent().Groups -contains 'S-1-5-32-544'
$RegPath = "Software\Microsoft\Windows\CurrentVersion\CapabilityAccessManager\ConsentStore\location\"
$CompValue = Get-ItemProperty ("HKLM:\" + $RegPath) -Name "Value" | Select-Object -ExpandProperty Value

if ($CompValue -ne "Allow" -and $IsAdmin) {
    Write-Verbose "Admin rights present. Editing registry to allow location services"
    Set-ItemProperty ("HKLM:\" + $RegPath) -Name "Value" -Value "Allow"
    $ChangedHKLM = $true
    $Continue = $true
} elseif ($CompValue -eq "Allow") {
    Write-Verbose "Local machine allows for location services"
    $Continue = $true
} else {
    Write-Verbose "No admin rights and location services denied at machine level"
    $Location = "Permission"
    $Continue = $false
}

if ($Continue) {
    $UserValue = Get-ItemProperty ("HKCU:\" + $RegPath) -Name "Value" -ErrorAction SilentlyContinue | Select-Object -ExpandProperty Value
    if ($UserValue -eq "Deny") {
        Write-Verbose "User config: location services denied"
        Write-Verbose "Updating registry for current user to allow location services"
        Set-ItemProperty ("HKCU:\" + $RegPath) -Name "Value" -Value "Allow"
    }
    Add-Type -AssemblyName System.Device
    $GeoWatcher = New-Object System.Device.Location.GeoCoordinateWatcher(1)
    Write-Verbose "Starting GeoCoordinateWatcher"
    $GeoWatcher.Start()
    $C = 0
    while (($GeoWatcher.Status -ne 'Ready') -and ($Geowatcher.Permission -ne 'Denied') -and ($C -le 15)) {
        Write-Verbose "[$C] Waiting 2 seconds for results"
        Start-Sleep -Seconds 2
        $C++
    }
    # need to wait a little longer to allow for more accurate data.

    Start-Sleep -Seconds 2
    $Location = ($GeoWatcher.Position.Location).ToString()
    $GeoWatcher.Dispose()
    if ($UserValue -eq "Deny") {
        Write-Verbose "Updating registry for current user to revert changes"
        Set-ItemProperty ("HKCU:\" + $RegPath) -Name "Value" -Value "Deny"
    }
}
if ($ChangedHKLM) {
    Write-Verbose "Updating registry for local machine to revert changes"
    Set-ItemProperty ("HKLM:\" + $RegPath) -Name "Value" -Value "Deny"
}
[PSCustomObject]@{
    Computer = $Env:COMPUTERNAME
    Location = $Location
    NetAdapter = (Get-NetAdapter -Physical | Where-Object {$_.Status -eq "Up"} | Select-Object -ExpandProperty Name) -Join ','
}
Let’s talk through this.

The first line is a method for determining if the current running user is in the local Administrators group. Then we save the bulk of a registry path for use later, and then check the HKLM value in the registry to see if Location Services are allowed.
When I tested this on several Domain joined computers it worked great (and was new to me) but as I write this on my personal computer I see some interesting behavior. My local account (a Microsoft account) is in the local Administrators group, but that first line returns false. Checking manually in the GUI it shows that I am in fact in that group, but the “Groups” property from that code doesn’t show that I’m in that group. So I flipped the logic around and instead got the members of that group to see if it contains the SID of the current user, and that returns true.

Ok, next section.
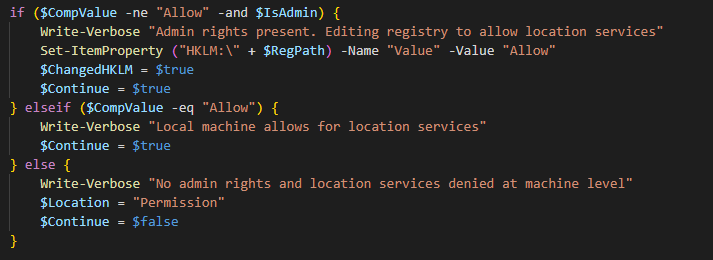
A little if/elseif/else action here. If Location Services is currently not being allowed at the computer level, and we’re running as admin, then change the registry and define a couple of variables. Else, if the value is already set to “Allow” then just define a variable. Else, finally, if we’re not running as admin then define that same variable as “False”. If that were the case, then this next section that checks that variable first, would be skipped.
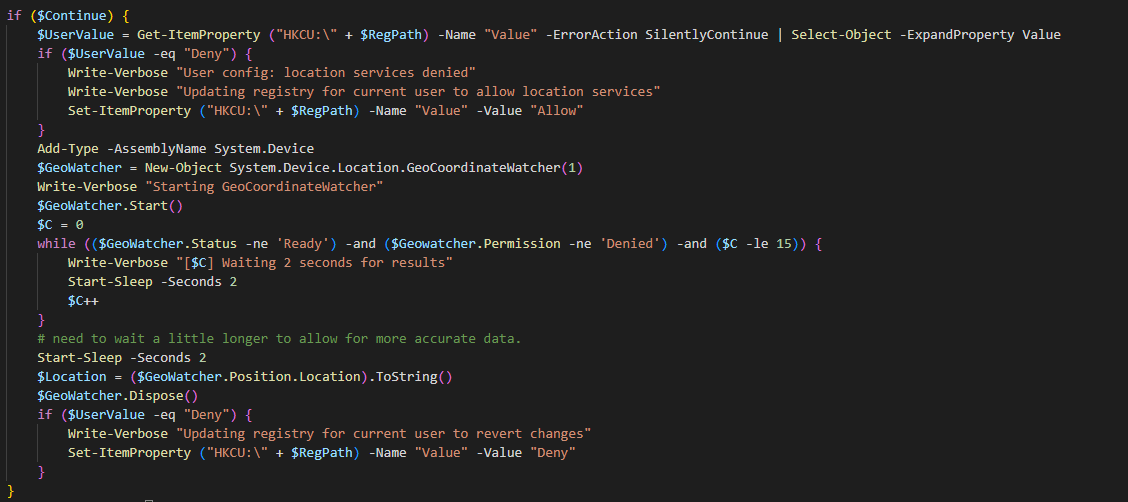
This is where we do the actual work. We’ve checked if Location Services is allowed at the computer level, and if that worked then “Continue” will be true. We start off by essentially doing the same registry check but for the Current User hive. If Location Services isn’t being allowed then we’ll change it to allow. Then we add our .NET namespace and create out GeoCoordinateWatcher object. Note the “(1)” at the end of that. This denotes that it should be created with “High Accuracy” mode. Since we’re only going to be leveraging it for a few seconds, I see no downside to this.Then we start the process and I also start a counter by defining “$C” as zero. No one else had this in their code, but I wasn’t sure what the maximum potential amount of time this process might take was, and I didn’t want to accidentally create an infinite loop so my while loop has 3 conditions. The final condition, the counter, must be less than or equal to 15. With the Start-Sleep statement within the loop set to 2 seconds this means the maximum amount of time this loop could go on for is approximately 30 seconds.
I then found through some testing that if you just immediately go from “Ready” to checking for the location that it may not actually be ready. Unclear what’s happening in the background, but if you just wait 2 more seconds it seems to allow for enough time. Then I take the positional data and use its own “ToString” method to save the GPS coordinates to a variable. Dispose of the GeoWatcher object and if the user’s registry value was changed by this script, change it back. The next section does the same thing for the computer registry hive.

Then finally the last section.

This just creates, and returns, a PSCustomObject with three properties: The current computer name, the GPS coordinates, and the name of the connected network adapters. Let’s execute all of this and see what that looks like.

Great! Now we have the name of the computer, some pretty accurate looking GPS coordinates, and the network adapter(s) that were present at the time. I included this because the presence of WiFi seems to be a pretty big factor in how accurate the GPS coordinates are and I thought it might be nice for reference.The reason it was written the way it was is because I figured more often than not I’m going to be running this against a remote computer and might want to pass this code as a script block. With that in mind, this is all collected together as a function called Get-GeoLocation, which has a parameter called “ComputerName” for specifying a remote computer you wish to run it against. This has only been tested in one Active Directory environment so far, but the code is available on Github in case you want to play around with it on your own.
GitHub Get-GeoLocationClosing Thoughts
When I started down this rabbit hole of trying to reliably determine a computer’s location I really did not want to use Powershell to do it. I know I have a tendency to use Powershell for everything and I wanted to use tools that we already had available to us. Unfortunately everything seems to rely on Geo-IP databases which return fairly inaccurate results. This was also a fun exercise in taking “found in the wild” code a step further and hydrating it with some more error handling, and features.
Remember to check out Microsoft’s documentation when you can, pipe to Get-Member, and just explore in general. It’s interesting what you’ll find. -
Quick Tip on ParameterSetNames
I was writing a new function today. Oddly enough I was actually re-writing a function today and hadn’t realized it. Let me explain.
Story Time
About a half dozen times a month I find myself inspecting a remote computer and invariably the question comes up “how long has this computer been up?” I always find myself looking up how to get computer uptime in Powershell and I always look for Doctor Scripto’s blog post where he shows a one-liner that can tell you a computer’s uptime:
PS$> (get-date) – (gcim Win32_OperatingSystem).LastBootUpTimeThe output of the command looks like this:
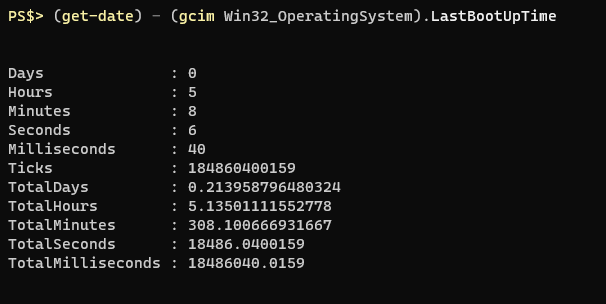
Totally sufficient. I’m usually in a remote Powershell session anyway and just copy/paste the command. I decided today that I would finally just buckle down and write a function to incorporate in my every day module that would allow me to query my own computer’s uptime as well as a remote computer. Since the info is also in the Win32_OperatingSystem class I thought I would include the date of install as this is often the “imaged” date at work which can be helpful to know as well.
Within about 10 minutes I had a rough draft of the function and it was successful in returning the information I wanted.
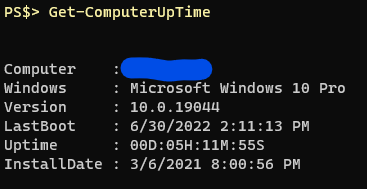
I clicked “Save As…” in VS Code and navigated to the folder where the other functions were stored only to see that there was already a function of the same name there dated just two months ago. I opened it to look at the contents and found that I had indeed written it, with some inspiration borrowed from online (and credited as such) but I didn’t actually like the way it was returning info. It also had a bit of a problem when it came to handling pipeline input. I relocated the “old” one and saved the new one in its place.
Tip of the day: ParameterSetName=”none”
The beginning of my new function was looking a lot like most of my new functions; I had declared cmdletbinding and a parameter block. Originally I had a “ComputerName” parameter to allow for specifying a computer other than the one you’re on, and then I thought to add a “Credential” parameter in case I needed to provide different credentials for the remote computer.
[Cmdletbinding()]
Param (
    [Parameter(Mandatory=$false,ValueFromPipeline=$true,Position=0)]
    [String]$ComputerName,
    [Parameter(Mandatory=$false,Position=1)]
    [pscredential]$Credential
)
The rest of the function was going fine but I had the thought that I wanted the function to require the “ComputerName” parameter if the Credential parameter was provided. I knew about parametersets and grouping parameters together by a name, but I wasn’t sure how this might work. I read a couple quick blog posts and saw that if I cast the “ComputerName” parameter as Mandatory and put it in the same parameterset as the “Credential” parameter it would work, but then it was ALWAYS asking for a value for the “ComputerName” parameter. In other functions where I had multiple parametersets this was handled by specfying a “DefaultParameterSetName” in the CmdletBinding definition. However, this function was only ever going to have one parameterset name. My first thought was “what if I just set it to something that doesn’t exist?”
I quickly changed the first part of my function to look like this, and it worked!
[Cmdletbinding(DefaultParameterSetName="none")]
Param (
    [Parameter(ParameterSetName="Remote",Mandatory=$false,ValueFromPipeline=$true,Position=0)]
    [String]$ComputerName,
    [Parameter(ParameterSetName="Remote",Mandatory=$false,Position=1)]
    [pscredential]$Credential
)
Now when calling the function with no arguments it does not ask for a “ComputerName” and returns information about the current computer. If I call the function with the “Credential” parameter but don’t supply a “ComputerName” value it will ask for one.

It’s a pretty unlikely scenario that I, or someone else, would call the function with JUST the “Credential” parameter and not the computer name, this was more of a proving ground type situation.
If you’d like to see the function in its entirety you can find it on my Github
That’s all for now. Until the next light bulb moment.
-
ProtectStrings. A Module Story
I’ve had an itch lately to do something with AES encryption in Powershell. I’ve tossed around the idea of building a password manager in Powershell, but I get so focused on the little details that I lose sight of the fact that Microsoft pretty much has that covered.
I’ve used ConvertTo/From-SecureString quite a bit for string management in scripts and I’ve even gone as far as creating a small module that allows me to save a credential using DPAPI encryption to an environmental variable for recall later. I have yet to do anything with AES encryption however. I have some scratch sheets saved regarding a more robust password manager module, but nothing has really come of it yet.
Two things happened recently to change some of this: I found myself with a need to encrypt some strings locally and save them to a file, and a coworker went down the rabbit hole of protecting PS credential objects with AES encryption. What follows is the story of ProtectString: A Powershell Module.
Table Of Contents
Protecting Credentials with AES
There are a lot of good articles out there on how to save Powershell credentials securely for use in scripts. Heck, I wrote one. For the sake of this post though let’s go over, specifically, the use of AES encryption for saving Powershell Credentials.
SecureString objects in Powershell are protected by Microsoft’s DPAPI encryption. Here’s the Wikipedia Page on DPAPI. Essentially the unique encryption key is derived from the user running it on the system they’re on. If a different user of the same computer tried to decrypt it using DPAPI it would fail. Move the DPAPI encrypted cipher text to another machine and try to decrypt it and it will fail as well. Not very portable, but it’s very convenient on the system you’re on. Using the Get-Credential cmdlet will yield a pop-up window where you can securely supply the password.
Get-Credential TestUser

UserName                     Password
--------                     --------
TestUser System.Security.SecureString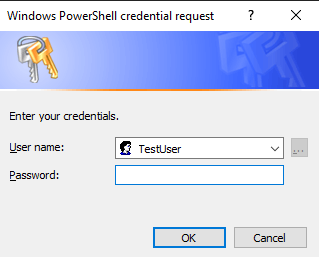
Using the Get-Credential cmdlet or the Read-Host cmdlet with the -AsSecureString parameter will net you a property that shows as a System.Security.SecureString object. If you were to convert from that SecureString object you would be left with cipher text:

Now, you could save this text to a file, and then read the text from a file later and convert it to a SecureString object and go about your business, but as I explained earlier it’s not portable because of the way DPAPI encryption works.Consider the following:
# Make a new byte array of 32 bytes

$Key = New-Object System.Byte[] 32
# Randomize each byte value using the .NET random number generator

[Security.Cryptography.RNGCryptoServiceProvider]::Create().GetBytes($Key)

# Get the text you want to protect

$Secret = Read-Host -AsSecureString

# Convert it from a SecureString object to cipher text using our AES 256-bit key

$AESText = ConvertFrom-SecureString $Secret -Key $Key
We create a new completely random 32 byte (256-bit) array to use as a key with AES encryption. We get text input from the user, stored as a SecureString object which is automatically protected in memory by DPAPI encryption. We then convert it from a SecureString object to just cipher text and we provide that 32 byte key. We end up with Base64 encoded cipher text like this:
76492d1116743f0423413b16050a5345MgB8ADIAaQA5ADkARgBKAHYAZABDAHAAQQB1ADgARgBrAFUAYgAwAEgAZgBLAFEAPQA9AHwANAA1ADAAY
wA3AGMANgAzADEAMwBmAGIAMwBhADIAMAAwADkANQA1AGQANAA3ADAAZAA5ADYAYQBlADgAOABhADIAOABmADgAYgA0AGMAZgAxADQAOAAyADkANg
AyADIANwBiADAAMQBlADcAZgBhADEAZQBkAGEAMQBmAGIANwBiAGIAOAA5ADIAYQA0ADMAYQBmADQAOQBlAGMAZQA1AGQAYQA0AGEAOQBlAGYAZAB
hAGUAMgA4ADQAMwA5ADAA
Now, we can save that to a file AND save our $Key variable to a file for use on the same system or a different system.
# Save the Key to a file

Out-File -FilePath "C:\Scripts\AESKey" -InputObject $Key

# Save the encrypted text to a file

Out-File -FilePath "C:\Scripts\TopSecret.txt" -InputObject $AESText
You can move those files to another computer, for another user even, and they can be used in this way.
# Import my AES Key

$Key = Get-Content "C:\Scripts\AESKey"

# Import my encrypted text

$AESText = Get-Content "C:\Scripts\TopSecret.txt"
Here’s a picture of what their values look like (common joined the key for easier viewing)

We can use that AES Key to convert our encrypted text back in to a SecureString object.
# Convert the encrypted text in to a SecureString object

$Secret = ConvertTo-SecureString $AESText -Key $Key
That SecureString object is now protected in memory with DPAPI encryption again. To convert it to plain text we have to use some .NET methods. Here’s a rather long one-liner that accomplishes this.
# Convert a SecureString object to plain text

[System.Runtime.InteropServices.Marshal]::PtrToStringAuto([System.Runtime.InteropServices.Marshal]::SecureStringToBSTR($Secret))
There it is. That’s how you can use a random key to convert SecureString objects to AES protected text, transport them somewhere, and decrypt them. But, you can’t just leave that AES key laying around anywhere. That would be like locking all of your valuables up in your house behind the strongest locks you could get, and then leaving the key laying under the doormat. We don’t protect our password managers like this, why should it be any different for credentials in Powershell?
Generating An AES Key
One thing I never liked about the above method was that you really need to save that AES key somewhere because it’s impossible to remember or produce again. One day while tumbling through Github I found a mobule by greytabby called PSPasswordManager. What particularly caught my attention was the class definition within for “AESCipher.” Here it is straight from Github.
class AESCipher {
    [byte[]] $secret_key

    AESCipher() {}

    [string] secure_string_to_plain($secure_string) {
        $bstr = [System.Runtime.InteropServices.Marshal]::SecureStringToBSTR($secure_string)
        $plain = [System.Runtime.InteropServices.Marshal]::PtrToStringBSTR($bstr)
        [System.Runtime.InteropServices.Marshal]::ZeroFreeBSTR($bstr)

        return $plain
    }

    [string] padding($key) {
        # aes key length is defined 256bit

        # padding key

        if ($key.length -lt 32) {
            $key = $key + "K" * (32 - $key.length)
        }elseif ($key.length -gt 32) {
            $key = $key.SubString(0, 32)
        }
        return $key
    }

    [void] input_secret_key() {
        $input_string = Read-Host -Prompt "Enter your secret key" -AsSecureString
        $input_plain = $this.secure_string_to_plain($input_string)

        $enc = [System.Text.Encoding]::UTF8
        $padded_key = $this.padding($input_plain)
        $key = $enc.GetBytes($padded_key)
        $this.secret_key = $key
    }

    [string] encrypt ($plain) {
        # plainpassword to securestring

        $secure_string = ConvertTo-SecureString -String $plain -AsPlaintext -Force

        # securestring to encrypted text

        $cipher = ConvertFrom-SecureString -SecureString $secure_string -key $this.secret_key

        return $cipher
    }

    [string] decrypt ($cipher) {
        # cipher text to secure string

        $secure_string = ConvertTo-SecureString $cipher -key $this.secret_key

        # secure string to plain text

        $plain = $this.secure_string_to_plain($secure_string)

        return $plain
    }
}
I observed that the intention was to provide a “secret key” or “master password” and then a 32 byte key would be derived from that and used to encrypt/decrypt the things inside the vault. As per usual, I got so focused on this that I failed to bring my head up and look around much at the bigger picture. I decided to just completely tax this class definition from greytabby and start working on the structure of my own password manager.
After a couple months of only sporadically working on this I hadn’t made much headway. A couple more class definitions, and some notes about desired functions, but I was finding myself busy with other things. Having a bit of a reputation around the shop as a Powershell nut I was asked one day to review a proposed solution provided by someone else. The request was to let some users do something on a server that requires administrative privilege, but not actually give them that privilege. The solution that was provided, via Powershell, was essentially to encrypt some admin credentials using a randomly generated AES key then create a script on the user’s computer that would know to retrieve the key file and cipher text from a restricted network share and then it would execute the tasks on the server as those credentials. While the logic was there, some of it was security through obscurity and ultimately it was just giving them admin credentials with extra steps. Anyone with access to the script file could see where the key file and encrypted text file were being store and go decrypt them at will if they like. It also meant that the keys to the castle would just be sitting on disk somewhere.
As I was calling these things out in my review I thought of the above class definition for an “AESCipher” and I thought *“oh hey, we could just tell the users some master password that they store securely in a password manager, and then they’d use that when they run the script and it would decrypt the saved credentials. Again, this was just giving them admin credentials with extra steps.
There was a benefit from this though because it got me looking at this class definition again and looking at specifically how he managed to take a provided password and generate the same AES key each time.
Password based key derivation, with extra steps
In the class definition let’s focus on this.
    [String] Padding($Key) {
        # AES Key Length is defined 256bit

        # Padding Key

        if ($Key.Length -lt 32) {
            $Key = $Key + "K" * (32 - $Key.Length)
        }
        elseif ($Key.Length -gt 32) {
            $Key = $Key.SubString(0, 32)
        }
        return $Key
    }
    [void] InputSecretKey() {
        $InputString = Read-Host -Prompt "Enter your secret Key" -AsSecureString
        $InputPlain = $this.SecureStringToPlain($InputString)
        $Enc = [System.Text.Encoding]::UTF8
        $PaddedKey = $this.Padding($InputPlain)
        $Key = $Enc.GetBytes($PaddedKey)
        $this.SecretKey = $Key
    }
Knowing that we want to end up with a 32 byte key the InputSecretKey() method leverages the Padding($Key) method to add extra bytes to the provided secret. If we use the secret “TopSecret” for example, that’s 9 characters, which is good for 9 bytes if we convert it. That leaves 23 bytes we still need. What greytabby did was just an if/elseif statement: If the resulting key length from our master password is less than 32 bytes then add the byte value for “K” X amount of times. If It’s greater than 32 characters then only take the first 32 characters. The Byte array for “TopSecret” would look like this:
84,111,112,83,101,99,114,101,116,75,75,75,75,75,75,75,75,75,75,75,75,75,75,75,75,75,75,75,75,75,75,75Notice all those “75”s? That’s the UTF8 byte value for a capitol “K”. I had flashbacks to working on my Natural Language Password script where I was looking to make sure I used the best random number generator available to me. In that process I found myself on this article from Matt Graeber that went in to pretty good detail about the differences between the Powershell cmdlet Get-Random and the .NET method RNGCryptoServiceProvider. The part that stuck in my brain was “entropy.” I didn’t feel good about creating an AES key based on a password that was always going to have a bunch of repetitive byte values. Armed with even just that it would be significantly easier to brute force the original key.
I started thinking more about how to better derive 32 bytes of random key values given a provided string. Unfortunately my scratch .ps1 file where I was testing different ideas is lost, but I’ll try to summarize so you can laugh at me.
Knowing I didn’t want to just add some consistent character to the string to hydrate a 32 byte array full of values I thought about some different options. I could double a given master password, or triple it, or whatever until it reached 32 bytes. There would be too obvious of a pattern in that. Oh, well, what do most authentication systems do? They hash the password. Surely Powershell must have a way to generate hashes of strings. As it turns out, it does not. There’s a Get-FileHash cmdlet, but as the name implies it’s for files. So I wrote this function to create hashes of strings.
Function Get-StringHash {
    [Cmdletbinding()]
    Param (
        [Parameter(Mandatory = $true, Position = 0, ValueFromPipeline = $true)]
        [String]$InputString,
        [Parameter(Mandatory = $false, Position = 2)]
        [ValidateSet("SHA1","SHA256","SHA384","SHA512","MACTripleDES","MD5","RIPEMD160")]
        [String]$Algorithm = "SHA256"
    )

    Process {
        $Stream = [IO.MemoryStream]::New([byte[]][char[]]$InputString)
        $Output = Get-FileHash  -InputStream $Stream -Algorithm $Algorithm
        $Stream.Dispose()
    }

    End {
        $Output
    }

}
The use would look something like this.

A SHA256 hash results in a 64-byte output string, every time, and it’s completely unique. Awesome, I’d solved it. But, I only needed 32 bytes so I decided to just use every other byte for a total of 32.
Pretty soon I had a function worked up to convert a supplied password (passphrase) in to a unique AES Key. But then that word started nagging me again. Entropy. Had I really created a function that would generate a key as unique as a randomly generated one? I decided that I should modify Matt Graeber’s work from the Powershell Magazine article and measure the entropy of randomly generated 32 byte arrays, and then my password derived byte arrays.
Again, the Powershell work I wrote to test this is gone and I don’t really feel like recreating it, but the gist is: I would use my Natural Language Password script to generate 1000 unique passphrases and I would generate 1000 unique randomly generated 32 byte keys. I would then compare the entropy of each method’s 1000 iterations and average the results. A random key was generating an average entropy calculation of 4.88. My function was somewhere around 3.42. I realized that hashstrings don’t include every possible character and therefore couldn’t produce every possible byte value. I tinkered with multiplication, Get-Random seeding, other hash algorithms, and a couple of other things but the highest I got my entropy number to was something like 3.62. I wasn’t happy. I searched the internet for something like “AES Key password based” and one of the results was “PBKDF2” or “Password Based Key Derivation Function.”

There I go again, not seeing the forest for the trees. Of course something like PBKDF2 exists, how else would be get unique keys for password managers, VPN connections, etc. A little bit of searching later and I had found a .NET method for leveraging PBKDF2 and when I tested it for entropy I was getting 4.88, just like the randomly generated keys.
PBKDF2 in Powershell
Focusing on the idea of an end user providing a master password, and turning that in to a unique 32 byte key, I set to work on a function for accomplishing this. Here’s the final product so we can go through it.
Function ConvertTo-AESKey {
    [cmdletbinding()]
    Param (
        [Parameter(Mandatory = $true, Position = 0)]
        [System.Security.SecureString]$SecureStringInput,
        [Parameter(Mandatory = $false)]
        [String]$Salt = '|½ÁôøwÚ♀å>~I©k◄=ýñíî',
        [Parameter(Mandatory = $false)]
        [Int32]$Iterations = 1000,
        [Parameter(Mandatory = $false)]
        [Switch]$ByteArray
    )

    Begin {
        # Create a byte array from Salt string

        $SaltBytes = ConvertTo-Bytes -InputString $Salt -Encoding UTF8
    }

    Process {
        # Temporarily plaintext our SecureString password input. There's really no way around this.

        $Password = ConvertFrom-SecureStringToPlainText $SecureStringInput
        # Create our PBKDF2 object and instantiate it with the necessary values

        $PBKDF2 = New-Object Security.Cryptography.Rfc2898DeriveBytes  -ArgumentList @($Password, $SaltBytes, $Iterations, 'SHA256')
        # Generate our AES Key

        $Key = $PBKDF2.GetBytes(32)
        # If the ByteArray switch is provided, return a plaintext byte array, otherwise turn our AES key in to a SecureString object

        If ($ByteArray) {
            $KeyOutput = $Key
        } Else {
            # Convert the key bytes to a unicode string -> SecureString

            $KeyBytesUnicode = ConvertFrom-Bytes -InputBytes $Key -Encoding Unicode
            $KeyAsSecureString = ConvertTo-SecureString -String $keyBytesUnicode -AsPlainText -Force
            $KeyOutput = $KeyAsSecureString
        }
    }

    End {
        return $KeyOutput
    }
}
With this function, if you provide the same password, you’ll get the same very unique, seemingly random, 32 byte key out of it. It can be reproduced on any computer with this same function.
The information for the .NET “Rfc2898DeriveBytes” method wasn’t hard to find, and all of the other articles surrounding PBKDF2 seemed to make sense. You need to provide a clear text password, a salt (in byte form), the number of iterations (1000 is standard) and the hashing algorithm. You can see in the above code I provided the salt statically. While this is exposed, it’s mostly to prevent against rainbow table attacks so this is seen as acceptable. There are a couple of help functions called out in here that I wrote along with this:
ConvertTo-Bytes ConvertFrom-Bytes ConvertFrom-SecureStringToPlainText
These just make it easier to read what’s happening but they’re all essentially using some .NET class in the background.
For security sake the derived key is then converted to a SecureString object using the standard DPAPI encryption and then returned.As an example, if I was to feed the password “password” in to the above function the resulting byte values would be
58,17,32,1,253,255,156,186,174,118,20,201,237,59,75,81,38,137,247,12,31,34,162,127,17,116,183,247,85,27,246,10I now had a function that would deal with collecting the master password from the user, and a function for converting that in to a unique AES Key using PBKDF2. As well as some helper functions. Now it’s time to encrypt some stuff.
Encrypting strings
I’ve covered how to protect string data with SecureString objects and AES encryption, and that’s exactly how I started this. I’d generate a unique key using my ConvertTo-AESKey function and then I would convert the supplied unprotected text to a SecureString object, convert it from a SecureString object with my AES Key and then output the resulting cipher text.
I did notice a bit of a pattern though when looking at some example text. Consider the following code and assume the $Key variable has a key in it already
$Words = @("test","test2","stuff","things")

Function Protect {
    Param (
        $InputObject
    )
    $SecureString = ConvertTo-SecureString $InputObject -AsPlainText -Force
    $CipherText = ConvertFrom-SecureString $SecureString -Key $Key
    $CipherText
}
$Words | %{
    Protect $_
}
The output text looks like this

I’ve highlighted some repeating text observed at the beginning of each example. I tried to find more information about how exactly ConvertFrom-SecureString operates with regards to AES encryption but I couldn’t find much out there. The output text is all base64 encoded, and decoding it offers only a little extra info.

Loading the cipher text in to an array called $CipherText and doing a foreach loop on the array with a quick and dirty ConvertFrom-Base64 function you can see there’s a bit of a pattern. Some bytes of indiscernible value, a pipe, another Base64 string, a pipe and likely our encrypted text. No matter what I encrypt the first string of bytes seems to be the same. The Base64 string in the middle changes every time, even if you’re encrypting the same plain text with the same AES key. I’m thinking this is the initialization vector that ConvertFrom-SecureString uses with each iteration. Then the last string after the pipe must be our encrypted data.
In my searches though for how to properly leverage AES encryption on strings in Powershell I ran across this blog by Richard Ulfvin. He did a really nice job of going through how to use the .NET classes to protect strings with AES encryption.
I quickly refactored my current method to use what he shared and found that the returned cipher text is exactly what I dictated be output: the first 16 bytes were the initialization vector, followed by my encrypted data.
Putting together Richard’s method and adding a small function to handle the invocation of the .NET AES Crypto provider I ended up with this.
Function ConvertTo-AESCipherText {
    <#
    .Synopsis
    Convert input string to AES encrypted cipher text
    #>
        [cmdletbinding()]
        param(
        [Parameter(ValueFromPipeline = $true,Position = 0,Mandatory = $true)]
        [string]$InputString,
        [Parameter(Position = 1,Mandatory = $true)]
        [Byte[]]$Key
        )

        Process {
        $InitializationVector = [System.Byte[]]::new(16)
        Get-RandomBytes -Bytes $InitializationVector

        $AESCipher = Initialize-AESCipher -Key $Key
        $AESCipher.IV = $InitializationVector
        $ClearTextBytes = ConvertTo-Bytes -InputString $InputString -Encoding UTF8
        $Encryptor =  $AESCipher.CreateEncryptor()
        $EncryptedBytes = $Encryptor.TransformFinalBlock($ClearTextBytes, 0, $ClearTextBytes.Length)
        [byte[]]$FullData = $AESCipher.IV + $EncryptedBytes
        $ConvertedString = [System.Convert]::ToBase64String($FullData)
        }
        End {
        $AESCipher.Dispose()
        return $ConvertedString
        }

}
Example output from that function would look like this.
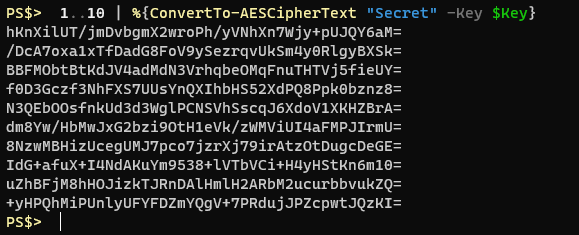
Note that encrypting the exact same string, with the same key, 10 times produces completely different cipher text. This is what true encryption should look like. Notice it’s also a bit more succinct than the ConvertFrom-SecureString method since it doesn’t have that mystery text at the beginning.
A Module takes shape
At this point I knew I wanted to be able to collect a master password from the user, derive a unique key from that, store it somewhere within the session for recurring use, and then encrypt and decrypt strings with it. It might also be nice to be able to export the unique key to a file and similarly import it from a file. This would allow you to provide a super long, complex, hard to memorize password, and still save the resulting key somewhere. This would be very similar in function to just randomly generating an AES key and saving the key to a file somewhere.
It would be nice to be able to check if the master password has been set. Remove it if needed, and also set it to a desired master password. For public facing functions that sets me up with:
Export-MasterPassword Import-MasterPassword Get-MasterPassword Set-MasterPassword Protect-String Remove-MasterPassword Unprotect-StringOn the private side of things however there’s a quite a few more things at play. I’ll list them and then talk about a few of them:
Clear-AESMPVariable ConvertFrom-AESCipherText ConvertFrom-Bytes ConvertFrom-SecureStringToPlainText ConvertTo-AESCipherText ConvertTo-AESKey ConvertTo-Bytes Get-AESMPVariable Get-DPAPIIdentity Get-RandomBytes Initialize-AESCipher New-CipherObject Set-AESMPVariableSet, Get and Clear AESMPVariable are all about storing the key in a global session variable. I was picturing myself importing a CSV to a variable and then encrypting certain properties from that CSV before writing it back out to a CSV file. I wouldn’t want to have to supply the same master password every time I performed this operation. The only thing I could think of so far was a global scope session variable. You can manually protect the data by running the “Remove-MasterPassword” function which will clear out the variable. In the future I may find a way to add a time-based limit on it, but my efforts towards that so far have been failures.
ConvertFrom-SecureStringToPlainText, while horribly named, is straight forward. It shows you the plaintext from a SecureString object by decrypting DPAPI protection.
A lot of the other functions are just pretty wrappers on a terse call to a .NET class. ConvertTo and ConvertFrom AESCipherText are all about performing that encryption and decryption operation described above using the supplied key from the master password.
Shortly after proving the function of most of my functions I had the thought that maybe, just maybe, I might (or someone else might) want to use the DPAPI encryption rather than AES. I decided that I would format my protected string output to conform to that of an object. The object would have two properties: Encryption type, and cipher text. The Encryption type would either be DPAPI or AES, and then the cipher text property would hold the encrypted text. Time for a class definition.
Class CipherObject {
    [String]  $Encryption
    [String]  $CipherText
    hidden[String]  $DPAPIIdentity
    CipherObject ([String]$Encryption, [String]$CipherText) {
        $this.Encryption = $Encryption
        $this.CipherText = $CipherText
        $this.DPAPIIdentity = $null
    }
}
This leads me in to talking about the Get-DPAPIIdentity function. Since DPAPI’s key is based on the user and the system I thought it might be handy to add that information to the output. That way if you attempt to decrypt DPAPI protected strings on another system, or as a different user, the error message could say who originally protected it.
If you attempt to decrypt AES protected text you’ll just get an error message stating that the key was incorrect and it will wipe out the currently saved master password.
Demo
Let’s say we had a CSV file with some sensitive information in it, like usernames and passwords, and the CSV looked like this.
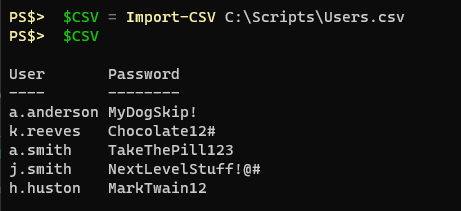
With the ProtectStrings module imported I can set my master password I want to use for encryption/decryption and then I can loop through this CSV and protect the sensitive information.

Then I can Export-CSV from that variable and safely write that information to disk. I can transport it to other computers, or other accounts, and when I reach my destination I can load the ProtectStrings module, set my master password, import the CSV, and loop through to decrypt the strings.
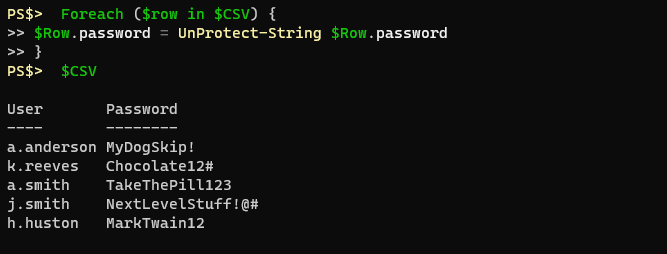
Here’s an example using the DPAPI encryption, which is currently the default if you don’t specify.

Here, I protect a string using AES encryption, then I clear the master password from the session and attempt to decrypt the same string again. I intentionally provide an incorrect master password, resulting in an error

If I use a different user account, or different PC, to protect a string using the default DPAPI encryption and then save that output to a file and transfer it to another user you will see that the decryption fails because I am not the same user.


Conclusions
Powershell is still fun and I still learn something new every day. Ultimately this module may not be very practical or have a lot of use, but it was a good exercise in writing functions and writing modules.
It’s not currently published anywhere as of writing this. I’m still using it internally and I have a specific project in mind where it could be helpful. This will help me iron out the kinks and eventually I’ll publish it to my repository on Github.
I’m not much of a cryptographer so if you see any glaring flaws please feel free to email me. Or if you have questions you may do the same.
Be good everyone, or be good at it.
-
Powershell all of the things. And more logging
“If all you have is a hammer, everything looks like a nail” - Abraham Maslow.
I use a variation of this quote a lot, and I typically use it in jest, but it’s also fairly true. I’m more than willing to admit when there is a better solution than trying to write a Powershell script. But I do love writing Powershell and often make the argument that since we predominately use Windows, it makes sense to script things via Powershell. I recently had occassion to script something in Powershell to automate a task. While the purpose of the script was to simplify a routine operation, I took it as an opportunity to leverage my in development logging module.
The Need
I recently learned that virtual F5 BIG-IPs should never be snapshot via a hypervisor as it can cause processes to stall out and high available clusters to fail over. Instead, F5 recommends that you create a configuration backup called a “UCS.” This is typically done with the web GUI and can then be downloaded from there and stored for safe keeping. Of course my first thought when learning this was “we can do that with Powershell.” I looked to see if F5’s BIG-IP had a REST API, and they did. Invoke-RestMethod to the rescue! Unfortunately I would say that F5’s documentation about their API leaves a little bit to be desired, especially concerning their UCS backups. I couldn’t find any examples of people using Powershell to automate the creation and download of UCS backups.
that being said, getting connected to the F5 BIG-IP with Invoke-RestMethod wasn’t too bad and you can authenticate with the built-in -Credential parameter and a PSCredential object. Like this:
$Uri = "https://$IP/mgmt/tm/sys/ucs"
$Headers = @{
    "Content-Type" = "application/json"
}
$UCSResponse = Invoke-RestMethod -Method GET -Headers $Headers -Uri $Uri -Credential $F5Creds
The request above will return some objects, stored in $UCSResponse, and among the properties you can get information about the current UCS archives on the appliance. I parse some of this information like this:
$CurrentUCS = Foreach ($UCSFile in $UCSResponse.items.apirawvalues) {
    [PSCustomObject]@{
        Filename = $UCSFile.filename.split('/')[-1]
        Version = $UCSFile.version
        InstallDate = $UCSFile.install_date
        Size = $UCSFile.file_size
        Encrypted = $UCSFile.encrypted
    }
}
The operation for creating a new UCS archive looks like this:
$Headers = @{
    "Content-Type" = "application/json"
}
$Body = @{
    name = "$BackupName"
    command ="save"
}
$Response = Invoke-RestMethod -Method POST -Headers $Headers -Body ($Body | ConvertTo-Json -compress) -Uri $Uri -Credential $F5Creds -ContentType 'application/json'
That’s really all there is to it. You hit the right URL, pass the API commands and options in the body of the request, and authenticate with a PSCredential object. However, there is no documentation for how to download the resulting UCS backup. They cover where it’s located on the machine, and there is another API call for downloading files from the BIG-IP however when I worked through that I found out the file download ended up only being 1MB instead of 300+MB.
Digging around some more I found another piece of F5 documentation that stated that their API for file downloads is capped at 1MB. This feels like an intentional move on F5’s part to push customer’s towards buying their BIG-IQ backup appliance for managing these things. Some members on their forum pointed out that F5’s own Python SDK can handle downloading a UCS archive, and it’s ultimately using the same API, so off I went to Github to read some Python. Turns out they built a loop in to their file download function that downloads the files in .5MB chunks while streaming it to a file. I also saw comments on Github that this is reportedly very slow.
Put the hammer down
I was about two hours in to writing my own version of this particular Python method in Powershell when I took a break and explained to a friend what I was doing. They looked at me as if I had told them I thought the CD-ROM tray was a cup holder. Once I looked up from what I was doing for a moment I realized I shouldn’t try to work within F5’s constraints and instead just Secure Copy (SCP) the file off the box. I’ve used the PoSH-SSH module before for SSH/SCP/SFTP functionality, and while I try to write scripts with little to no dependencies this seemed like a worthwhile inclusion.
I put a “Sanity Checks” section near the beginning of my script and this is where I verify prerequisites. Checking for PoSH-SSH looks like this:
if (-not(Test-path "C:\Program Files\WindowsPowerShell\Modules\posh-ssh")){
    Write-Host "Posh-SSH is needed to connect to SCP. Please install and try again" -ForegroundColor Red
    Exit
}
# import the Posh-SSH module for making an SCP connection

Import-Module -Name 'Posh-SSH' -Scope Local
Since this is a script and not a function I feel comfortable with using “Exit” to terminate script execution. Another thing I import is my in-development logging module. I’ve still been leveraging the module on the daily in conjunction with another module that’s really just a collection of daily-use functions. This script represented an opportunity to take advantage of good logging for auditing and troubleshooting purposes since this script could be ran daily or weekly. I also wanted the script to log to a local file on my computer as well as a file on a network share, something I had envisioned from the onset of the WriteLog module.
I decided to try importing the module via a literal path:
$PathToLogging = "C:\Scripts\Modules\WriteLog"
if (-not(Test-Path $PathToLogging)) {
    Write-Host "Logging Module not found at $PathToLogging" -ForegroundColor Red
    Write-Host "Please modify the PathToLogging variable and try again" -ForegroundColor Yellow
    Exit
} Else {
    Import-Module -Name $PathToLogging
}
For brevity I’ve shown the variable and its use in one snippet. With the logging available I can start using module functions to record and display output.
Set-WriteLogConfig -LogFilePath $LogDir -LogServerPath $NetworkLogPath -WriteHost
Start-Log -ScriptVersion "1.3"
Write-LogEntry "Task running as $env:username"
This starts off by establishing a set of variables related to logging activities: The local file path, network file path, whether or not to display the information to the host, log to a global variable, and the logname. Some of this information is determined automatically and as you can see some is provided with parameters. Then I can start the log entry with “Start-Log” which just puts a header of sorts in the log file and in this case includes the script version. This way if I’m looking back through the logs and see a different behavior and notice that it was version “1.2” instead maybe that will help me correlate.
For the rest of the script I’ll use “Write-LogEntry” and “Write-LogObject” to log information as well as display it to the host. What the console sees is exactly what gets logged to file.
Add-Content vs Out-File
There’s some pretty good pages out there that cover the difference between the Add-Content and Out-File cmdlets. I can’t honestly remember my decision process early on. I was originally using Out-File in all my logging functions until I did a Get-Help on Add-Content and saw that the -Path parameter would accept an array of objects. I thought this would be really handy for dynamically providing the destination for logging. It could be a single local file, or as many local files and network files as you wanted to put in the array. The actual code in Write-LogEntry for writing data to a file would only have to be one line in that case and you could manage the destination as a variable. You can see how this originally tuned out in my previous post where I outlined how must of this functioned.
I’ve been using it with Add-Content for months now without issue, but I’ve only been logging to a local file. For this backup script I wanted to log locally and to a network file. I immediately saw red text upon testing complaining that a “stream was unreadable” or something like that. File locks appeared to be the issue and all of my Google-fu was telling me that Out-File had better file lock handling. A quick refactor of my Write-Log functions and my errors were gone. Instead of a one-liner I came up with this instead for Write-LogEntry:
Foreach ($FileDestination in $Destination){
    Out-File -FilePath $FileDestination -Encoding 'UTF8' -Append -NoClobber -InputObject ('{0} {1}: {2}' -f $OutputObject.Timestamp,$OutputObject.Severity,$OutputObject.LogObject) -ErrorAction Stop
}
The end result is the same on the console and in the text file, and at least so far, it doesn’t seem to be much slower. This was a good usecase for testing my logging module. There were a couple of other little tweaks too but we don’t need to go in to them in this post.
Execute
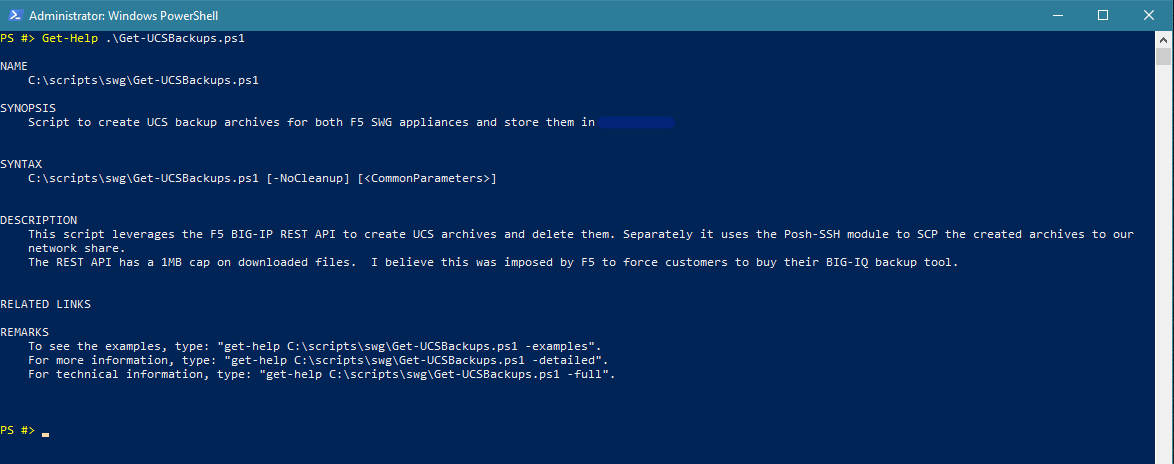
Now that logging had been sorted out, and all the other functional pieces were in place we could execute the script. A quick Get-Help shows that there is only one parameter and it’s an override to skip removing older backups.
The first thing that happens after executing the script is a request for credentials. This is for authenticating against the F5 BIG-IP, for both the web API and SCP.
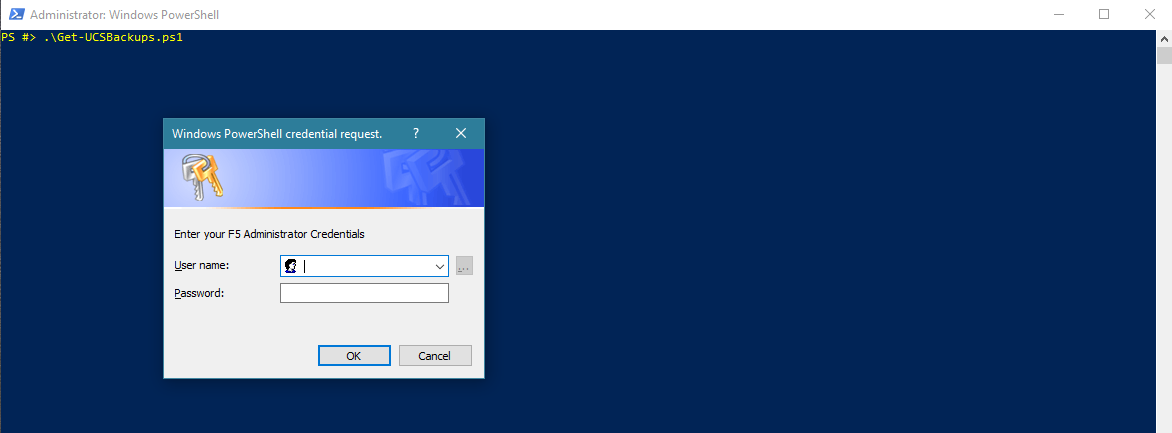
If I wanted to run this script as a scheduled task I’d need to secure those F5 credentials and make them available to the account executing the scheduled task.
The script connects to the first F5 appliance we’re backing up and shows a list of the current UCS backup files present on the machine. Then it sends the API call to create a new UCS backup. This can take a moment or so: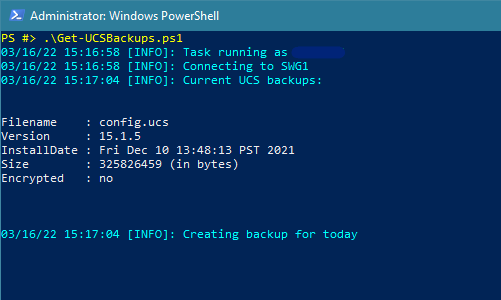
Once the backup is created the script moves on to using SCP to copy the file off the F5 appliance and to a network share. Thanks to the developers of the PoSH-SSH module there’s a nice progress bar while you wait for this to complete. I also called the cmdlet in the script with the -Verbose switch for extra information:
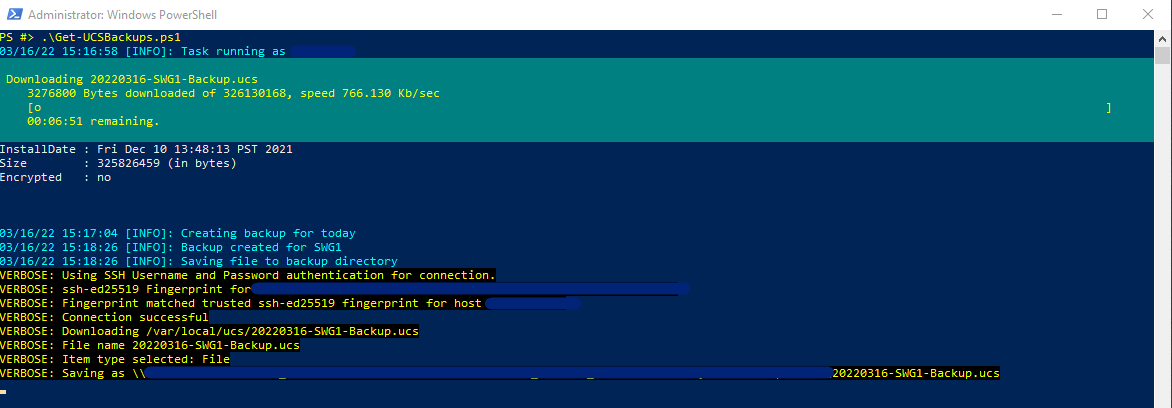
Loops through and does the next appliance:
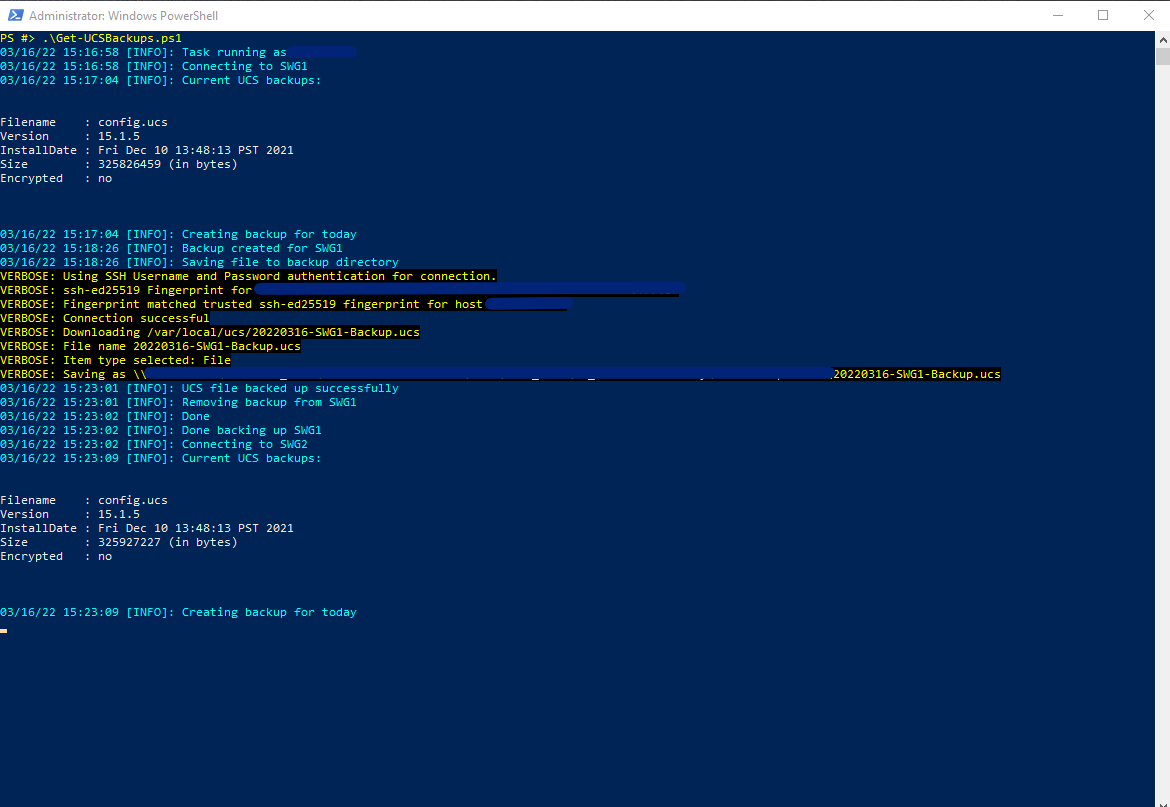
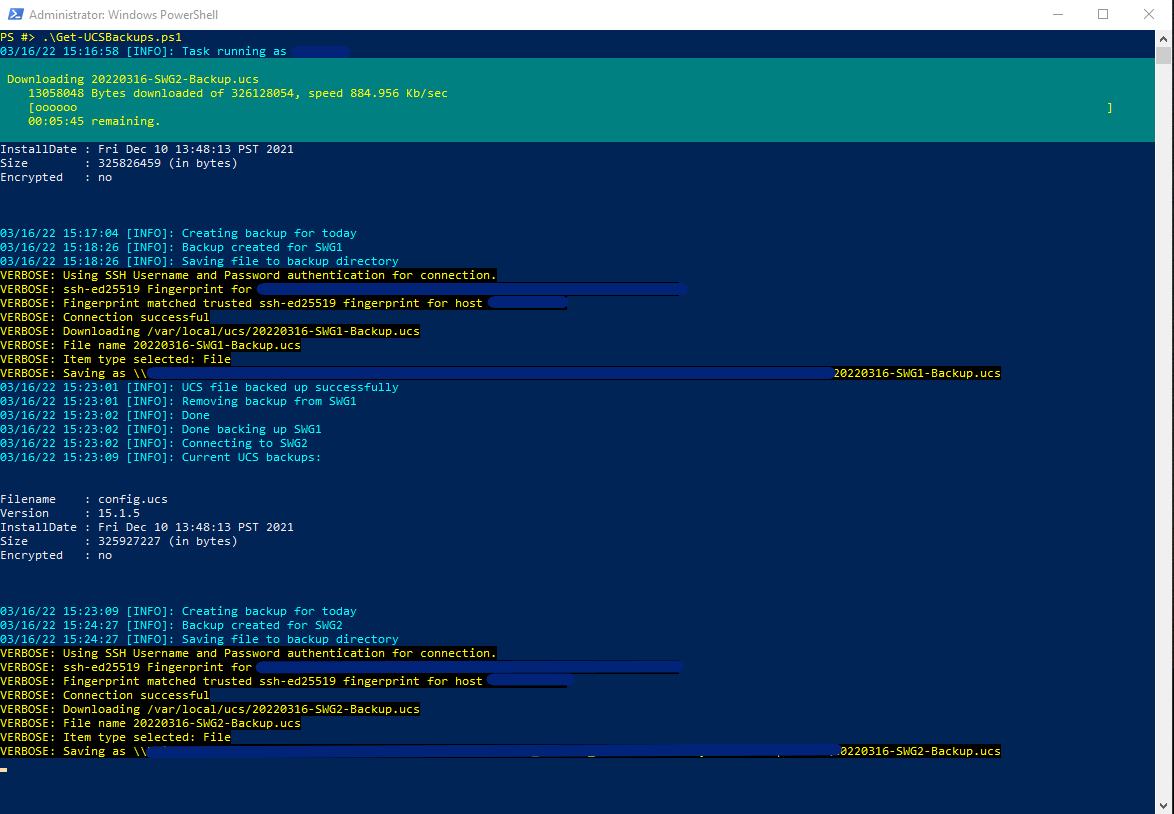
The tail end of the script deals with the backup destination directory. It get’s all of the *.ucs files, and references anything that’s older than 90 days. It then shows you these files (thereby logging it as well) and then removes them:
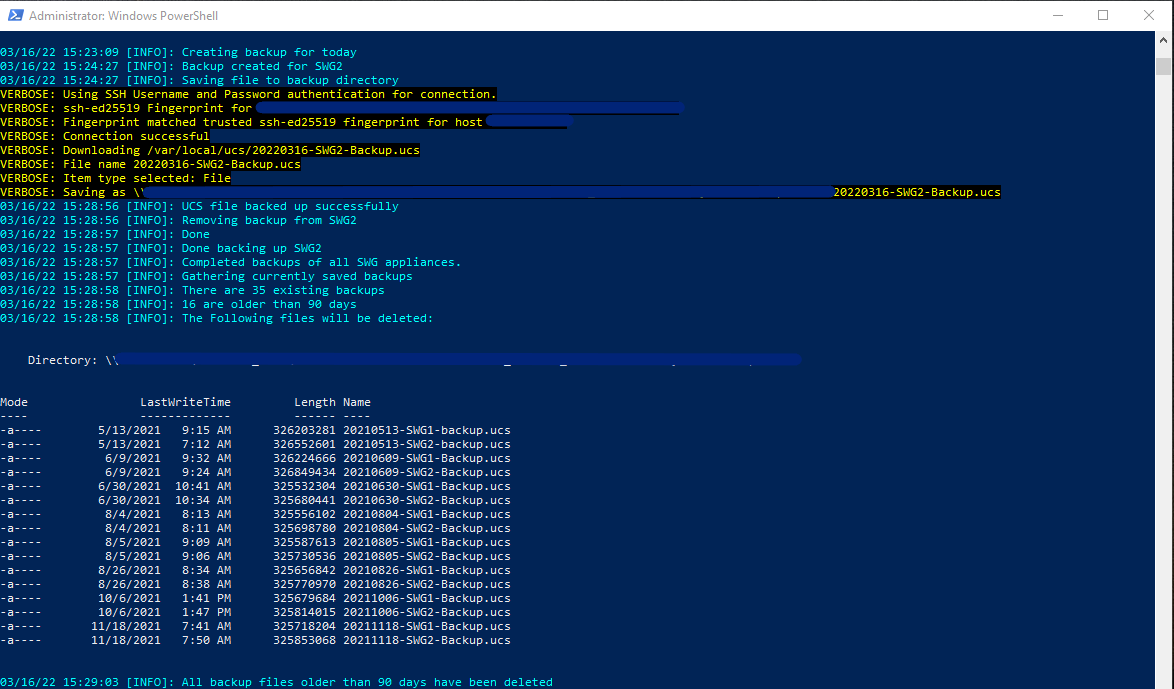
Here’s a snippet of one of the log files to show that it looks just like the console output:
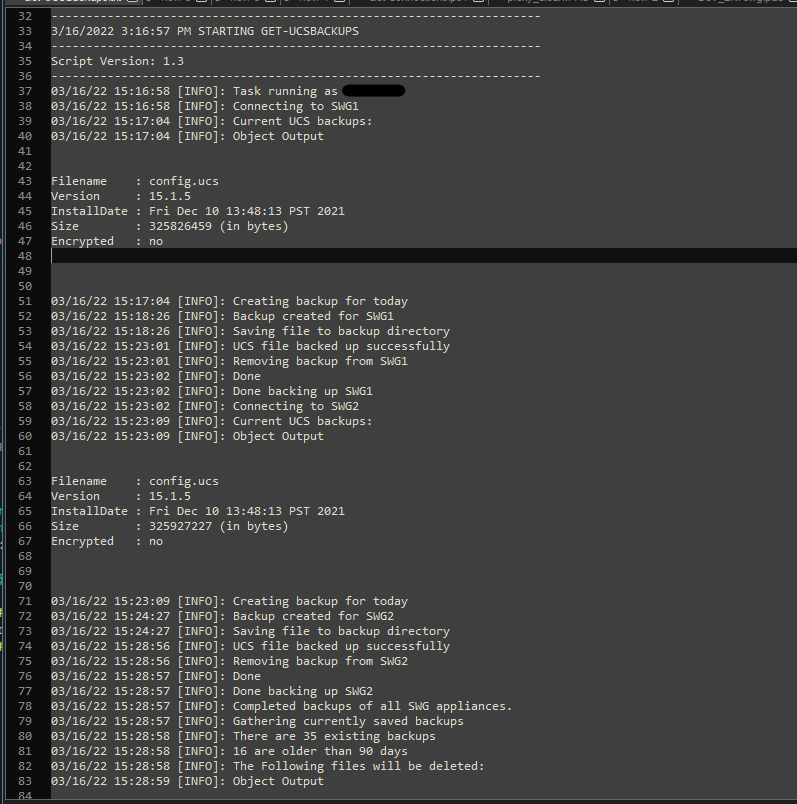
Conclusion
The end script is about 200 lines for something that could probably be done in less than 20 (not including the logging module). However, this should be fairly robust, transferable to other team mates, and includes really good logging so that I or others can audit the operation and troubleshoot any problems. Also, I learned why people recommend Out-File over Add-Content so often. Consequently, Out-File also outputs Powershell objects the way they are seen on the console when writing to a file, whereas the *-Content cmdlets do not. So actually I’ve been using Out-File in my Write-LogObject function from the get-go to capture object output the same way it’s seen on the console. Maybe that should have been a clue.
-
Get-WindowsFirewallBlocks
Introduction
I’ve had some exposure to Microsoft Defender here and there, but I was in a class with Microsoft recently where they were going over some more features in depth. At one point, while discussing the firewall aspect, I asked if there was any good place to see logs of what Windows Firewall was blocking. I was directed to two places; Event Viewer, and a static text file. This post will be about the Event Viewer portion.
The Logs
If you open Event Viewer and expand the “Applications and Services Logs”, then “Microsoft”, “Windows”, and finally “Windows Firewall With Advanced Security” you’ll find the “Firewall” log.
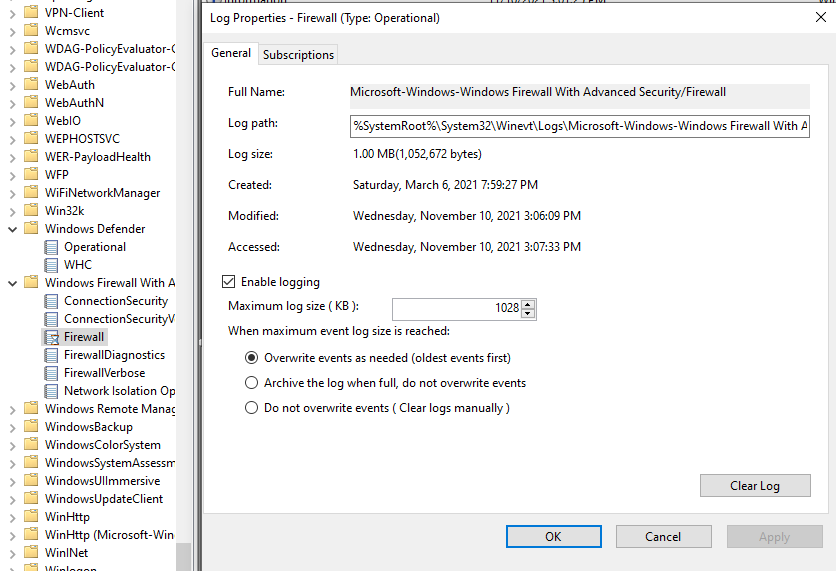
This log contains entries regarding firewall rule changes, network profile changes and so on. It also contains entries under the ID ‘2011’ where Defender would have notified the user that an application was blocked from accepting an inbound connection. Instead that notification is not enabled (on the systems I’m talking about) so it is instead logged in Event Viewer.It’s simple enough to filter the current log in Event Viewer and just look at the ones with Event ID 2011, but the actual message that’s logged is where the good info is:
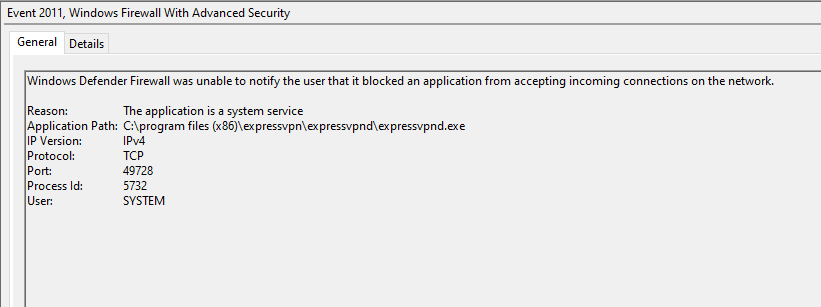
Unfortunately if you’re looking for a high level view of these logs it’s kind of difficult. Or worse yet, if there’s a specific executable, or port that you’re curious about, there’s no way to filter the logs for that info. Of course my first thought was Powershell.Powershell Info Gathering
I first went to search the internet for how to view these logs in Powershell. I’m familiar with searching through the “Security”, “Application” and “System” logs with “Get-EventLog” but wasn’t sure about logs within “Applications and Services Logs.” One of the first places I landed had this nice one-liner. I just changed the Event ID to match what I was looking for:
$Events = Get-WinEvent -FilterHashtable @{Logname="Microsoft-Windows-Windows Firewall With Advanced Security/Firewall"; id=2011}Now that I have an array full of events I could start to look at them and figure out where the info I want it.

Pretty similar to what I see in the graphical Event Viewer. Looking deeper at the “Message” property I could see the info I want:

Unfortunately I could also see that the “Message” property was a string object. If I wanted the individual items listed within I’d have to parse the string object. Another quick search and I found someone’s example that they used the “ToXML” method of the original object to convert the whole entry to XML.

Great, we should be able to work with this. The only thing that stood out when exploring the XML data was that the “IP Version”, “Reason” and “Protocol” were all numerical represented. This would mean that this object, “System.Diagnostics.Eventing.Reader.EventLogRecord”, is automatically converting those numeric values to pretty string values for us to look at. Well, two can play at that game.Make A Class
From looking at the info within a single event log I knew I’d want the date stamp, and then all of the info contained within the message itself. I started writing down a custom Class with all of the properties I’d want. Like this:
Class FirewallEvent {
    [DateTime]$DateTime
    hidden[String]$ReasonCode
    [String]$ApplicationPath
    [String]$IPVersion
    [String]$Protocol
    [Int32]$Port
    [Int32]$ProcessID
    [String]$User
}
I marked the “ReasonCode” as hidden because so far the only example I’ve seen is “Windows Defender Firewall was unable to notify the user that it blocked an application from accepting incoming connections on the network.” which get’s translated as a ‘1’. Now I’ve got an object with the properties I want, but I’m going to want to manipulate some of the input data when I create the object. We need a Class Constructor:
Class FirewallEvent {
    [DateTime]$DateTime
    hidden[String]$ReasonCode
    [String]$ApplicationPath
    [String]$IPVersion
    [String]$Protocol
    [Int32]$Port
    [Int32]$ProcessID
    [String]$User
    FirewallEvent ([DateTime]$DateTime, [Array]$MessageInfo) {
        $this.DateTime          = Get-Date $DateTime -Format 'MM/dd/yy HH:mm:ss'
        $this.ReasonCode        = $MessageInfo[0].'#text'
        $this.ApplicationPath   = $MessageInfo[1].'#text'
        $this.IPVersion         = Switch ($MessageInfo[2].'#text') {
            1 {'IPv6'}
            0 {'IPv4'}
        }
        $this.Protocol          = Switch ($MessageInfo[3].'#text') {
            6 {'TCP'}
            17 {'UDP'}
        }
        $this.Port              = $MessageInfo[4].'#text'
        $this.ProcessID         = $MessageInfo[5].'#text'
        $this.User     = ([System.Security.Principal.SecurityIdentifier]($MessageInfo[6].'#text')).Translate([System.Security.Principal.NTAccount]).Value
    }
}
This Adam The Automator post is how I got started with Classes so I’ll just summarize what I did here and why. Firstly, I saw I wanted the date stamp. That was easy enough as it’s a property of the original Event Log object:

Then looking at the XML some more, the original “Message” text that I wanted is now an array of objects with two properties: “Name” and “#text”.

Since it’s conveniently in array I could pass the entire array to my class constructor and just manually index through the array to assign the values I want. The class constructor also gives me the opportunity to convert the original values to something else (see the Switch blocks for “IPVersion” and “Protocol”). Then I just had to look up a way to convert an SID to a readable username and I’m all set.Put It Together
Still working in VS Code I had the following:
# Get the events

$Events = Get-WinEvent -FilterHashtable @{Logname="Microsoft-Windows-Windows Firewall With Advanced Security/Firewall"; id=2011}
# Define our class

Class FirewallEvent {
    [DateTime]$DateTime
    hidden[String]$ReasonCode
    [String]$ApplicationPath
    [String]$IPVersion
    [String]$Protocol
    [Int32]$Port
    [Int32]$ProcessID
    [String]$User
    FirewallEvent ([DateTime]$DateTime, [Array]$MessageInfo) {
        $this.DateTime          = Get-Date $DateTime -Format 'MM/dd/yy HH:mm:ss'
        $this.ReasonCode        = $MessageInfo[0].'#text'
        $this.ApplicationPath   = $MessageInfo[1].'#text'
        $this.IPVersion         = Switch ($MessageInfo[2].'#text') {
            1 {'IPv6'}
            0 {'IPv4'}
        }
        $this.Protocol          = Switch ($MessageInfo[3].'#text') {
            6 {'TCP'}
            17 {'UDP'}
        }
        $this.Port              = $MessageInfo[4].'#text'
        $this.ProcessID         = $MessageInfo[5].'#text'
        $this.User     = ([System.Security.Principal.SecurityIdentifier]($MessageInfo[6].'#text')).Translate([System.Security.Principal.NTAccount]).Value
    }
}
# Loop through and convert them to FirewallEvent objects

$LogObjects = ForEach ($Event in $Events) {
    $EventXML = [xml]$Event.ToXml()
    [FirewallEvent]::new($EventXML.event.System.timecreated.systemtime, $EventXML.event.EventData.data)
}
Now I could look at “$LogObjects” and see my results:

Great! Now I can use Where-Object to filter them, or Export-CSV to save them to a .csv file.Tell you what. Throw a little hot-rod red in there
Might as well use the filtering logic that I just created the other week for looking at my logging module logs. Here’s the first iteration of this function:
Function Get-WindowsFirewallBlocks {
    <#
    .Synopsis
    Gets the block messages from the "Windows Firewall with Advanced Security" Event Viewer Log
    .NOTES
    Version:        1.0
    Author:         C. Bodett
    Creation Date:  11/10/2021
    Purpose/Change: Initial function development
    #>
    [cmdletbinding()]
    [Alias("GWFB")]
    Param (
        [DateTime]$After,
        [DateTime]$Before,
        [DateTime]$Timestamp,
        [String]$Executable,
        [ValidateSet("IPv4","IPv6")]
        [String]$IPVersion,
        [ValidateSet("TCP","UDP")]
        [String]$Protocol,
        [ValidateRange(1,65535)]
        [Int32]$Port,
        [Int32]$ProcessID,
        [String]$User
    )

    Begin {
        $Events = Get-WinEvent -FilterHashtable @{Logname="Microsoft-Windows-Windows Firewall With Advanced Security/Firewall"; id=2011}

        $WhereArray = [System.Collections.ArrayList]@()

        If ($After) {
            [void]$WhereArray.Add('(Get-Date $_.Datetime) -gt $After')
        }
        If ($Before) {
            [void]$WhereArray.Add('(Get-Date $_.Datetime) -lt $Before')
        }
        If ($Timestamp) {
            [void]$WhereArray.Add('(Get-Date $_.Datetime) -eq $Timestamp')
        }
        If ($Executable) {
            [void]$WhereArray.Add('$_.ApplicationPath -Match $Executable')
        }
        If ($IPVersion) {
            [void]$WhereArray.Add('$_.IPVersion -Match $IPVersion')
        }
        If ($Protocol) {
            [void]$WhereArray.Add('$_.Protocol -Match $Protocol')
        }
        If ($Port) {
            [void]$WhereArray.Add('$_.Port -eq $Port')
        }
        If ($ProcessID) {
            [void]$WhereArray.Add('$_.ProcessID -eq $ProcessID')
        }
        If ($User) {
            [void]$WhereArray.Add('$_.User -Match $User')
        }

        $WhereString = $WhereArray -join " -and "
        $WhereBlock = [ScriptBlock]::Create($WhereString)

        Class FirewallEvent {
            [DateTime]$DateTime
            hidden[String]$ReasonCode
            [String]$ApplicationPath
            [String]$IPVersion
            [String]$Protocol
            [Int32]$Port
            [Int32]$ProcessID
            [String]$User
            FirewallEvent ([DateTime]$DateTime, [Array]$MessageInfo) {
                $this.DateTime          = Get-Date $DateTime -Format 'MM/dd/yy HH:mm:ss'
                $this.ReasonCode        = $MessageInfo[0].'#text'
                $this.ApplicationPath   = $MessageInfo[1].'#text'
                $this.IPVersion         = Switch ($MessageInfo[2].'#text') {
                    1 {'IPv6'}
                    0 {'IPv4'}
                }
                $this.Protocol          = Switch ($MessageInfo[3].'#text') {
                    6 {'TCP'}
                    17 {'UDP'}
                }
                $this.Port              = $MessageInfo[4].'#text'
                $this.ProcessID         = $MessageInfo[5].'#text'
                $this.User     = ([System.Security.Principal.SecurityIdentifier]($MessageInfo[6].'#text')).Translate([System.Security.Principal.NTAccount]).Value
            }
        }

    }

    Process {
        $LogObjects = ForEach ($Event in $Events) {
            $EventXML = [xml]$Event.ToXml()
            [FirewallEvent]::new($EventXML.event.System.timecreated.systemtime, $EventXML.event.EventData.data)
        }

        If ($WhereString) {
            $Results = $LogObjects | Where-Object $WhereBlock
        } Else {
            $Results = $LogObjects
        }
    }

    End {
        $Results
    }
}
Conclusion
This is still just one piece of the puzzle. There are also firewall logs located at “%SystemRoot%\system32\LogFiles\Firewall\pfirewall.log” if you have logging enabled there. I will have to do some more testing and see what other information lies there.
-
Logging in Powershell scripts; Continued
In my previous post I explained a bit about some of my justifications for logging in Powershell. My interest in logging has continued since then and I spent some time exploring Github reading other people’s functions and modules. I saw some really neat features amongst all of the code out there and began to think about how I might use some of them in my daily work life. I have a small module I built and maintain at work, internally, that’s just a collection of some tools (like Get-ADPasswordInfo) to help streamline some tasks. I don’t particularly have a need for logging in my module, but there are other departments adjacent to mine that run a lot of Powershell scripts within the organization and they definitely log throughout their scripts. I decided that I wanted to try purpose-building a module from the ground up for logging. The idea would be to develop it, integrate it with my daily use module for testing, and ultimately publish it to the Powershell Gallery for other people to use if they like.
Getting Started
The first step was to write down all of the things I would want the module to do as each one of those would represent a function. I also needed to think about how it might do these things. With some inspiration from Github I decided to approach it like this; from the perspective of a script that’s going to be logging, what needs to happen?
Similar to the logging function in my previous post each script would need to know some settings about logging before it could continue. Where are we logging to? Are we displaying the log info to console? Should we also keep track of current session logs?
I wanted a function that would handle creating a script scope variable that would contain the logging settings. These settings could be defined via the same function when executed, using parameters, or if executed with no parameters it would look for global saved settings. Global settings themselves would need two functions: one to save them to an environmental variable, and one to retrieve them.
A function to save logging preferences globally, a function to retrieve those preferences, and a function to set those preferences as script scope variables. For sure we’ll need a function to actually write a log entry and based on one example I saw in Github I want a pair of functions for starting a log and stopping a log.Now I had an idea of some functions with some possible names that just needed to be paired up with the appropriate verbs.
- Save-WriteLogConfig
- Get-WriteLogConfig
- Set-WriteLogConfig
- Start-Log
- Stop-Log
- Write-LogEntry
This would be enough to get me started.
Laying The Ground Work
Not as sexy, but just as important, is to layout the structure for our module. There are plenty of good blog posts, including this one from Warren F , that dive in to creating modules so I won’t spend too much time on this.
The way I like to write and maintain functions for a module is in individual .ps1 files. There’s also a chance that there will be functions that a user of the module should be aware of, and use, and then there will be functions that are internal to the function of the module itself that a user does not need to interact with. I like the terms “Public” and “Private” for separating these function.
One of the things I knew I wanted to play with in this module was a custom class for creating a “log object” as well as a custom format file for controlling the appears of these objects. In addition to the standard module manifest file and .psm1 I’ll create the following folders:- Classes
- Formats
- Private
- Public
My .psm1 file contents would then look like this:
$Public  = Get-ChildItem -Path $PSScriptRoot\Public\*.ps1 -ErrorAction SilentlyContinue
$Private = Get-ChildItem -Path $PSScriptRoot\Private\*.ps1 -ErrorAction SilentlyContinue
$Classes = Get-ChildItem -Path $PSScriptRoot\Classes\*.ps1 -ErrorAction SilentlyContinue

$AllManifestItems = $Public + $Private + $Classes

#Dot source the files

Foreach($Item in $AllManifestItems){
    Try{
        . $Item.fullname
    }
    Catch{
        Write-Error -Message "Failed to import Item $($Item.fullname): $_"
    }
}
Simple enough right? It just gets all of the .ps1 files from the folders that contain them, and then loops through and dot sources them. There are other ways to do this, perhaps better, but this is how I’ve been doing it thus far.
Working down my list of functions I needed to start with I created the files and began writing. “Save-WriteLogconfig” was probably the simplest as it just needed to save information in an environment variable. This can be accomplished pretty succinctly with a hashtable:
$Config = @{
    LogFilePath         = $LogFilePath
    LogServerPath       = $LogServerPath
    CurrentSessionLogs  = $CurrentSessionLogs
    WriteHost           = $WriteHost
}
[Environment]::SetEnvironmentVariable("PSLogging", ($Config | ConvertTo-Json -Compress), "User")
Then it just needs a good parameter block:
Param(
    [validatescript({
        if( -not ($_ | test-path) ){
            throw "Folder does not exist"
            }
        if(-not ( $_ | test-path -pathtype Container) ){
            throw "The -path argument must be a folder"
            }
            return $true
    })]
    [Parameter(Mandatory = $true)]
    $LogFilePath,
    [validatescript({
        if( -not ($_ | test-path) ){
            throw "Folder does not exist"
            }
        if(-not ( $_ | test-path -pathtype Container) ){
            throw "The -path argument must be a folder"
            }
            return $true
    })]
    $LogServerPath,
    [Parameter(ParameterSetName = "Switch")]
    [Alias("CSL")]
    [Switch]$CurrentSessionLogs,
    [Parameter(ParameterSetName = "Switch")]
    [Alias("WH")]
    [Switch]$WriteHost
)
Then the companion function “Get-WriteLogConfig” to retrieve these settings:
Function Get-WriteLogConfig {
    [cmdletbinding()]
    Param(
        [Parameter(Mandatory = $false, ParameterSetName = "Env")]
        [String]$PSLogConfig = ([environment]::GetEnvironmentVariable("PSLogging", "User"))
    )

    try {
        $Settings = $PSLogconfig | ConvertFrom-Json
    } catch {
        Throw "Failed to import existing Json: $($_.Exception)"
    }

    if ($PSLogConfig){
        $PSLogPowershellVariables = @{
            LogFilePath         = $Settings.LogFilePath
            LogServerPath       = $Settings.LogServerPath
            LogName             = $Settings.LogName
            CurrentSessionLogs  = $Settings.CurrentSessionLogs.IsPresent
            WriteHost           = $Settings.WriteHost.IsPresent
        }
        $PSLogPowershellVariables
    } else {
        Write-Host "Could not find any settings. Save settings with Save-WriteLogConfig" -ForegroundColor Yellow
    }
}
Testing these was simple enough as I just needed to be able to provide settings and verify that I could recall them in the current session, or a new session. Next up, I want to be able to retrieve these settings within a script, or provide the settings.
Set-WriteLogConfig
“Set-WriteLogConfig” accomplishes this:
Function Set-WriteLogConfig {
    [cmdletbinding(DefaultParameterSetName = 'Env')]
    Param(
        [Parameter(Mandatory = $true, ParameterSetName = "Manual")]
        [ValidateScript({
            if( -not ($_ | test-path) ){
                throw "Folder does not exist"
                }
            if(-not ( $_ | test-path -pathtype Container) ){
                throw "The -path argument must be a folder"
                }
                return $true
        })]
        $LogFilePath,
        [Parameter(Mandatory = $false, ParameterSetName = "Manual")]
        [ValidateScript({
            if( -not ($_ | test-path) ){
                throw "Folder does not exist"
                }
            if(-not ( $_ | test-path -pathtype Container) ){
                throw "The -path argument must be a folder"
                }
                return $true
        })]
        $LogServerPath,
        [Parameter(Mandatory = $false, ParameterSetName = "Manual")]
        [String]$LogName,
        [Parameter(Mandatory = $false, ParameterSetName = "Manual")]
        [Parameter(ParameterSetName = "Switch")]
        [Alias("CSL")]
        [Switch]$CurrentSessionLogs,
        [Parameter(Mandatory = $false, ParameterSetName = "Manual")]
        [Parameter(ParameterSetName = "Switch")]
        [Alias("WH")]
        [Switch]$WriteHost,
        [Parameter(Mandatory = $false, ParameterSetName = "Env")]
        [String]$PSLogConfig = ([environment]::GetEnvironmentVariable("PSLogging", "User"))
    )

    $ScopeLevel = Get-LogScopeLevel
    If ($null -eq $ScopeLevel) {
        $ScopeLevel = 1
    }

    If (-not ($LogName)) {
        $Callstack = Get-PSCallStack
        $Source = $Callstack[$ScopeLevel].Command
    } Else {
        $Source = $Logname
    }

    switch ($PSCmdLet.ParameterSetName) {
        'Env' {
            try {
                $Settings = $PSLogconfig | ConvertFrom-Json
            } catch {
                Throw "Failed to import existing Json: $($_.Exception)"
            }

            if ($null -eq $Settings -or [boolean]($null -eq $Settings.LogFilePath)) {
                Write-Verbose "No loggings settings provided. Using defaults"
                $Settings = @{
                    LogFilePath         = ${env:temp}
                    LogServerPath       = $null
                    LogName             = [System.Io.Path]::GetFileNameWithoutExtension($Source)
                    CurrentSessionLogs  = $false
                    WriteHost           = $false
                    Scope               = $ScopeLevel
                }
            }

            $PSLogPowershellVariables = @{
                LogFilePath         = $Settings.LogFilePath
                LogServerPath       = $Settings.LogServerPath
                LogName             = [System.Io.Path]::GetFileNameWithoutExtension($Source)
                CurrentSessionLogs  = $Settings.CurrentSessionLogs.IsPresent
                WriteHost           = $Settings.WriteHost.IsPresent
                Scope               = $ScopeLevel
            }
        }
        'Manual' {
            $PSLogPowershellVariables = @{
                LogFilePath         = $LogFilePath
                LogServerPath       = $LogServerPath
                LogName             = [System.Io.Path]::GetFileNameWithoutExtension($Source)
                CurrentSessionLogs  = $CurrentSessionLogs
                WriteHost           = $WriteHost
                Scope               = $ScopeLevel
            }
        }
    }
    Initialize-WriteLogConfig @PSLogPowershellVariables
}
There’s kind of a lot happening here, and if you read through that you may have noticed a couple of new functions. As I was writing this module, I realized that there was a need for more functions than I originally planned. I also continued to look through Github for inspiration for how others had handled similar setups.
Param
The first thing of note is actually the parameter block, and more specifically that I’ve arranged the parameters in to two sets by name. The “Env” parameter set and the “Manual” parameter set. The former implying that the logging settings will be retrieved from the environment variable created by “Save-WriteLogConfig”. The latter more plainly stating that these settings will be provided manually via the parameters of this function. More on this in a bit.
Logging Scope
The next thing of note is “Get-LogScopeLevel” right at the beginning of the script. I was inspired a lot by EsOsO’s “Logging” module on Github when I first started my research. They actually a few functions built around this idea of “scope” but I wasn’t sure I understood it at first glance. As I started testing my module in use with functions I noticed some behavior that made my realize why this was necessary. At first I was getting the calling script name through other means to use as the name of the log file. I.e. if the script was called “Get-AllUsers” and this logging module was used inside, it would automatically create a logfile named “Get-AllUsers.txt” without any input saying so. Where this got messed up was when I called a function within a function and both of them were leveraging the logging module. The logs were start off being written to a file for function A, and then after function B was executed the remaining logs would all be written to it. This is because the “Set-WriteLogConfig” function is called at the beginning of any participating script and would overwrite the script scope variable with those new settings.
I needed a function to get the current scope level as well as one to set the scope level. The idea being that if I knew I was about to call a function within a function that’s already logging I could manually set the scope level with “Set-LogScopeLevel” to direct the logs to all continue within the scope of the parent script/function. Just another script scope variable to add to the list:
Function Set-LogScopeLevel {
    [CmdletBinding()]
    Param(
        [Parameter(Mandatory = $false, Position = 0)]
        [Int]$ScopeLevel = 1
    )

    $Script:PSLogging.Scope = $ScopeLevel
}
The companion “Get-LogScopeLevel” basically just retrieving the numeric value stored in that variable.
Moving down the “Set-WriteLogConfig” function a little further you can see where this comes in to play:$ScopeLevel = Get-LogScopeLevel If ($null -eq $ScopeLevel) { $ScopeLevel = 1 } If (-not ($LogName)) { $Callstack = Get-PSCallStack $Source = $Callstack[$ScopeLevel].Command } Else { $Source = $Logname }The method I settled on for getting the script name is a cmdlet I hadn’t seen before but stumbled across on one of my searches. If you were to open Powershell and just type “Get-PSCallStack” it would output this:
Command       Arguments Location
-------       --------- --------
<ScriptBlock> {}        <No file>
Now, write a function called “Test” that just contains “Get-PSCallStack” and execute “test.” Your output will look like this:
Command       Arguments Location
-------       --------- --------
test          {}        <No file>
<ScriptBlock> {}        <No file>
By capturing the output of “Get-PSCallStack” in to a variable I essentially create an array. Since arrays are 0-indexed in Powershell that means if my “LogScopeLevel” is 1, it would be the second thing in this array which would always be the script/function that the logging functions were called within. If the script is called “Get-AllUsers” and “Set-WriteLogConfig” is called within that, it will pull “Get-AllUsers” as the name of the second object returned from “Get-PSCallStack”. The “Logname” can also be provided manually but it is part of the parameter set “Manual” which means all of the other settings would also be required.
Switch block
Moving along in the body of the function I use a switch block off of ‘$PSCmdLet.ParameterSetName’ variable to load up a hashtable named “$PSLogPowershellVariables.” Whichever one the switch block uses the end result is the same; the “Initialize-WriteLogConfig” function takes that hastable as splatted parameters.
Initialize that config
“Initialize-WriteLogConfig” is the other new function I decided I needed and there’s no need for it to be publicly accessible so it gets to be our first “private” function. Its job is simple. It takes each one of the logging settings it’s fed via the named parameters, and creates a new variable in the script scope containing them. That way any other logging functions that need to leverage those settings can retrieve them from the script scope variable.
Function Initialize-WriteLogConfig {
    [cmdletbinding()]
    Param(
        [Parameter(Mandatory = $true)]
        [String]$LogFilePath,
        [Parameter(Mandatory = $false)]
        [String]$LogServerPath,
        [Parameter(Mandatory = $true)]
        [String]$LogName,
        [Switch]$CurrentSessionLogs,
        [Switch]$WriteHost,
        [Int]$Scope
    )

    $Script:PSLogging = @{
        LogFilePath         = $LogFilePath.TrimEnd('\')
        LogServerPath       = $LogServerPath.TrimEnd('\')
        LogName             = $LogName
        CurrentSessionLogs  = $CurrentSessionLogs
        WriteHost           = $WriteHost
        Scope               = $Scope
    }

}
Seems like a lot so far and we haven’t even gotten to anything resembling logging.
Custom Class
I mentioned in the beginning that I wanted to create a custom class for a log object in this module and also a formats file. Let’s look at these before we get in to “Write-LogEntry.”
I use “PSCustomObject” in my scripts a lot as a way to control the output from loops, or to store info in arrays for easier formatting as tables, or output to CSV files. A powershell class is basically just an object definition. There is way more depth to these then I got in to with mine. I just needed to define an object so I could write a formats file for it. The class looks like this:
Class LogEntryObject {
    [Int32]   $Index
    [String]  $Timestamp
    [String]  $Source
    [String]  $Severity
    $LogObject
    LogEntryObject ([DateTime]$Timestamp, [String]$Source, [String]$Severity, $LogObject) {
        $this.Timestamp = Get-Date $Timestamp -Format 'MM/dd/yy HH:mm:ss'
        $this.Source = $Source
        $this.Severity = '[{0}]' -f $Severity.ToUpper()
        $this.LogObject = $LogObject
    }
}
This has changed a bit since the initial iteration, and may change still. But the core of a log entry for me was going to be a timestamp, the source name for where this log is from, the severity level and then the actual log message itself (“$LogObject”). Tyler Muir’s post on AdamTheAutomator.com is where I got a lot of my info for this.
I’m using a class constructor to control the formatting of the timestamp and severity properties. Then to further control the creation of a LogEntryObject I created another private function called “New-LogEntryObject.”
Function New-LogEntryObject {
    [cmdletbinding()]
    Param (
        [Parameter(Mandatory = $false, Position = 2)]
        [DateTime]$Time = (Get-Date),
        [Parameter(Mandatory = $true, Position = 0)]
        [String]$Source,
        [Parameter(Mandatory = $true, Position = 1)]
        [String]$Severity,
        [Parameter(Mandatory = $false, Position = 3)]
        $LogObject
    )

    [LogEntryObject]::New($Time, $Source, $Severity, $LogObject)
}
Then the .ps1xml format file that accompanies this custom class is how I control the color output of the “Severity” property. I saw an example on Reddit, and borrowed most of the methodology from this post. The only part of this code with any much significance is the section regarding the “Severity” property:
<?xml version="1.0" encoding="utf-8"?>
<Configuration>
  <ViewDefinitions>
    <View>
      <Name>LogEntryObject</Name>
      <ViewSelectedBy>
        <TypeName>LogEntryObject</TypeName>
      </ViewSelectedBy>
      <TableControl>
        <TableHeaders>
            <TableColumnHeader>
                <Label>Index</Label>
            </TableColumnHeader>
            <TableColumnHeader>
                <Label>Timestamp</Label>
            </TableColumnHeader>
            <TableColumnHeader>
                <Label>Source</Label>
            </TableColumnHeader>
            <TableColumnHeader>
                <Label>Severity</Label>
            </TableColumnHeader>
            <TableColumnHeader>
                <Label>LogObject</Label>
            </TableColumnHeader>
        </TableHeaders>
        <TableRowEntries>
          <TableRowEntry>
            <TableColumnItems>
            <TableColumnItem>
                <PropertyName>Index</PropertyName>
            </TableColumnItem>
            <TableColumnItem>
                <PropertyName>Timestamp</PropertyName>
            </TableColumnItem>
            <TableColumnItem>
                <PropertyName>Source</PropertyName>
            </TableColumnItem>
            <TableColumnItem>
                <ScriptBlock>
                  $Esc = [char]27
                  $Reset = [char]27 + "[0m"
                  $Color = switch ($_.Severity){
                    {$_ -eq '[INFO]'} {"96"}
                    {$_ -eq '[ERROR]'} {"91"}
                    {$_ -eq '[WARNING]'} {"93"}
                    }
                  "$($Esc)[$($color)m$($_.Severity)$($Esc)[39m"
                </ScriptBlock>
            </TableColumnItem>
              <TableColumnItem>
                <PropertyName>LogObject</PropertyName>
              </TableColumnItem>
            </TableColumnItems>
          </TableRowEntry>
        </TableRowEntries>
      </TableControl>
    </View>
  </ViewDefinitions>
</Configuration>
A fairly simple to understand switch block. Info severity’s are blue, Error’s are red, and Warning’s are yellow. With those pieces in place I could move on to writing log entries.
Are we logging yet?
“Write-LogEntry” could now be written more effectively since these other building blocks were in place:
Function Write-LogEntry {
    [cmdletbinding()]
    [Alias("Write-Log")]
    Param(
        [Parameter(Mandatory = $false, Position = 0)]
        [String]$Message,
        [Parameter(Mandatory = $false, Position = 1)]
        [ValidateSet("Info","Warning","Error")]
        [String]$Severity = "Info",
        [Parameter(Mandatory = $false, Position = 2)]
        [Switch]$SuppressOutput
    )

    Begin {
        if (-not ($Script:PSLogging)) {
            try {
                Set-WriteLogConfig
            } catch {
                Throw [System.Management.Automation.ParameterBindingException] 'PSLogging is not configured yet. Run Set-WriteLogConfig first'
            }
        }

        If (-not ($Global:CurrentSessionLogs)) {
            $Global:CurrentSessionLogs  = [System.Collections.ArrayList]@()
        }

        $Destination = @()

        If ($PSLogging.LogFilePath -and $PSLogging.LogName) {
            $LogFile = '{0}\{1}.txt' -f $PSLogging.Logfilepath,$PSLogging.Logname
            $Destination += $Logfile
        }

        If ($PSLogging.LogServerPath -and $PSLogging.LogName) {
            $ServerLogFile = '{0}\{1}.txt' -f $PSLogging.LogServerPath,$PSLogging.Logname
            $Destination += $ServerLogFile
        }
        $OutputObject = New-LogEntryObject -Source $PSLogging.LogName -Severity $Severity -LogObject $Message
    }

    Process {
        Add-Content -Path $Destination -Value ('{0} {1}: {2}' -f $OutputObject.Timestamp,$OutputObject.Severity,$OutputObject.LogObject)
        If ($PSLogging.WriteHost -and (-not $SuppressOutput)){
            Switch ($OutputObject.Severity){
                '[INFO]' {Write-Host ('{0} {1}: {2}' -f $OutputObject.Timestamp,$OutputObject.Severity,$OutputObject.LogObject) -ForegroundColor Cyan}
                '[WARNING]' {Write-Host ('{0} {1}: {2}' -f $OutputObject.Timestamp,$OutputObject.Severity,$OutputObject.LogObject) -ForegroundColor Yellow}
                '[ERROR]' {Write-Host ('{0} {1}: {2}' -f $OutputObject.Timestamp,$OutputObject.Severity,$OutputObject.LogObject) -ForegroundColor Red}
            }
        }
        If ($PSLogging.CurrentSessionLogs) {
            [void]$Global:CurrentSessionLogs.Add($OutputObject)
        }
    }
}
Let’s step through this a bit with the previous functions in mind. Starting right off with the “Severity” parameter you can see that I’ve created a set of valid values to ultimately control what gets sent to “New-LogEntryObject.” This is also where I default to “Info” severity so that “Write-LogEntry” can be called without specifying this parameter.
First check in the beginning of the script is to see if “$PSLogging” exists in the script scope. If it doesn’t exist then someone hasn’t been following directions and didn’t run “Set-WriteLogConfig”. We’ll attempt to run it ourselves and hope for saved settings via “Save-WriteLogConfig.”
The next step is to check and see if there’s a global scope variable called “CurrentSessionLogs” and if not, create an array list of that name. An array list offers an important distinction compared to regular arrays: it is not fixed size so you can add objects to it individually without having to tear it down and build it again using something like “+=”. In addition to logging to a file, or files, I wanted to log to a global variable so that, within a given session, you could retrieve logs from scripts you’ve executed.
Then we set up our destinations. This could be a single local file and/or a file located on a network share. The log name will be taken from the script scope “$PSLogging” variable.
Last bit of set up is creating our “LogEntryObject” using the “New-LogEntryObject” private function. It takes whatever value was provided to the “$Message” parameter of this function and uses it to satisfy the “LogObject” parameter of “New-LogEntryObject.”
On to processing. One line with “Add-Content” handles the actual writing to a file(s) since the “Path” parameter will accept an array of values. I may need to change this later if I decide I want to incorporate Mutex in to my logging module.
A switchblock handles the console output, if the logging settings deem to do so. I use “Write-Host” so I can colorize the output to match the colors I used in the format file .ps1xml.
The last piece is adding the same object to the global “CurrentSessionLogs” variable.
What about logging objects?
I knew I wanted to log pretty much anything coming out of my scripts, but I hadn’t thought far enough ahead to realize that if I wanted to log, to a file, the output from scripts I wouldn’t be able to use “Add-Content” and maintain the way output looks. To preserve, for instance, the way an array of PSCustomObjects looks in the console when written to a file I would need to use “Out-File” instead. Since this is a different task needed when logging I decided there should be a “Write-LogObject” function as well:
Function Write-LogObject {
    [cmdletbinding()]
    [Alias("Write-LogObj")]
    Param(
        [Parameter(Mandatory = $false, Position = 0)]
        $InputObject,
        [Parameter(Mandatory = $false, Position = 1)]
        [ValidateSet("Info","Warning","Error")]
        [String]$Severity = "Info",
        [Parameter(Mandatory = $false)]
        [Switch]$Passthru,
        [Parameter(Mandatory = $false)]
        [Switch]$SuppressWriteHost
    )

    Begin {
        if (-not ($Script:PSLogging)) {
            try {
                Set-WriteLogConfig
            } catch {
                Throw [System.Management.Automation.ParameterBindingException] 'PSLogging is not configured yet. Run Set-WriteLogConfig first'
            }
        }

        If (-not ($Global:CurrentSessionLogs)) {
            New-Variable -Name "CurrentSessionLogs" -Scope Global -Value ([System.Collections.ArrayList]@())
        }

        $Destination = @()

        If ($PSLogging.LogFilePath -and $PSLogging.LogName) {
            $LogFile = '{0}\{1}.txt' -f $PSLogging.Logfilepath,$PSLogging.Logname
            $Destination += $Logfile
        }

        If ($PSLogging.LogServerPath -and $PSLogging.LogName) {
            $ServerLogFile = '{0}\{1}.txt' -f $PSLogging.LogServerPath,$PSLogging.Logname
            $Destination += $ServerLogFile
        }
        $OutputObject = New-LogEntryObject -Source $PSLogging.LogName -Severity $Severity -LogObject $InputObject
    }

    Process {
        Add-Content -Path $Destination -Value ('{0} {1}: {2}' -f $OutputObject.Timestamp,$OutputObject.Severity,"Object Output")
        Foreach ($FileDestination in $Destination){
            Out-File -FilePath $FileDestination -InputObject $OutputObject.Logobject -Encoding ASCII -Append
        }

        If (-not $SuppressWriteHost -and -not $Passthru) {
            $InputObject | Out-Default
        } Else {
            $InputObject
        }

        If ($PSLogging.CurrentSessionLogs) {
            [void]$Global:CurrentSessionLogs.Add($OutputObject)
        }
    }
}
You can see the similarities. The big differences are in the “Process” block where it handles the first two tasks differently. First it adds a line to log files that says “Object Output” to signify that the next lines contain that. Then it loops through the destinations and uses “Out-File” to write the info in ASCII.
For outputting to the console I actually needed an “If” statement depending on circumstances. For instance, if I wanted to output the results of a script to the console using “Write-LogObject” but I also wanted to pipe them to “Format-Table” I needed to pipe the log object to “Out-Default.” This was necessary to get things to output to the console in the order expected. Without this I was having script results output on the screen in an unexpected order relative to other operations. This blog post goes in to some really good detail about that.
Lastly the same log object is added to the “$CurrentSessionLogs” variable globally for retrieval later.
Get the current session logs
The global variable full of current session logs was honestly the part I wanted to use the most, while I pictured other people might have more use for the actual logging to a file aspect. I was comfortable with just calling the variable “$CurrentSessionLogs” and then piping to “Where-Object” to get just the things I wanted, but I decided recently that there should be one more public function.
“Get-CurrentSessionLogs” or “GCSL” for short will retrieve the logs from the global variable, and also provides filtering options for retrieving specifics entries. Let’s take a look:
Function Get-CurrentSessionLogs {
    [cmdletbinding()]
    [Alias("GCSL")]
    Param(
        [DateTime]$After,
        [DateTime]$Before,
        [DateTime]$Timestamp,
        [String]$Source,
        [ValidateSet("Info","Warning","Error")]
        [String]$Severity,
        [String]$Contains,
        [ValidateRange(1,999999)]
        [Int32]$Index,
        [Switch]$LogOnly
    )

    Begin {
        $WhereArray = [System.Collections.ArrayList]@()

        If ($After) {
            [void]$WhereArray.Add('(Get-Date $_.Timestamp) -gt $After')
        }
        If ($Before) {
            [void]$WhereArray.Add('(Get-Date $_.Timestamp) -lt $Before')
        }
        If ($Timestamp) {
            [void]$WhereArray.Add('(Get-Date $_.Timestamp) -eq $Timestamp')
        }
        If ($Source) {
            [void]$WhereArray.Add('$_.Source -Match $Source')
        }
        If ($Severity) {
            [void]$WhereArray.Add('$_.Severity -Match $Severity')
        }
        If ($Contains) {
            [void]$WhereArray.Add('$_.LogObject -Match $Contains')
        }

        $WhereString = $WhereArray -join " -and "
        $WhereBlock = [ScriptBlock]::Create($WhereString)

        $StartIndex = 1
        $CurrentSessionLogs | Foreach-Object {$_.index = $StartIndex; $StartIndex++}

        If ($Index) {
            $IndexNum = $Index - 1
        }
    }

    Process {
        If ($WhereString) {
            $Results = $CurrentSessionLogs | Where-Object $WhereBlock
        } Else {
            $Results = $CurrentSessionLogs
        }
        If ($PSBoundParameters.keys -contains 'Index') {
            $Results = $Results[$IndexNum]
        }
        If ($LogOnly) {
            $Results = $Results.LogObject
        }
    }

    End {
        $Results
    }
}
This was pretty fun to work on. I wrote down a list of all the ways you might want to filter the logs entries by: time, source, severity, keyword. I also wanted to be able to look on the screen, see a specific log, and be able to call it by its index number position in the array. With 20+ objects in the array this was a little hard when manually indexing in to the array with “$CurrentSessionLogs[14]” as an example. This was actually when I went back and edited the “LogEntryObject.ps1” class file to add the “Index” property.
Filtering
For “time” I actually decided that using Powershell’s “Get-Date” cmdlet I wanted to be able to filter on entries “Before” and “After” a given time, as well as providing a specific timestamp. “Source” and “Severity” are pretty straight forward as is “Contains” for keyword searching.
The interesting task was figuring out how to dynamically create a “Where-Object” statement. I wanted to be able to provide no parameters, or combinations of parameters, and still have it function. Writing each “Where-Object” statement is simple enough and I knew that I could chain them together with “-and” but it took some looking around to figure out the next part. If you do “Get-Help” on “Where-Object” there’s actually a lot in there, and admittedly I hadn’t really looked at it before. I always use “Where-Object” similar to this:Get-Process | Where-Object {$_.Name -match "Firefox"}Or I’ll use the alias for “Where-Object”, “?” for brevity. However, upon reading the help info I saw that the parameter that occupies position 0 is a Filter Script:
    -FilterScript <System.Management.Automation.ScriptBlock>
        Specifies the script block that is used to filter the objects. Enclose the script block in braces (`{}`).


        Required?                    true
        Position?                    0
        Default value                None
        Accept pipeline input?       False
        Accept wildcard characters?  false
This means I could technically pass it a variable as long as that variable is of object type “ScriptBlock.” This makes the operation pretty straightforward then and could be done with “If” statements or a “Switchblock.”
- Make an array to store our filter script statements
- Make a string out of all of the objects in that array and join them together with “-and”
- Create a script block object using that string
And we’re done. Now in the process block we show filtered results, unfiltered results, a specific entry by index number, or just the actual logged info. If “GCSL” is executed once it will show all of the logs on the screen like so:

Then if you provide a specific index number and re-run “GCSL” it will return only that entry:

Then if you just want the original output, or “LogObject” from a specific entry you can add that parameter:

The logs
Now you’ve seen the current session logs aspect, which is admittedly my favorite part. But this is about logging, and it wouldn’t be logging without something being written to disk. To incorporate WriteLog in to my existing module’s functions I went through and replaced every instance of “Write-Host” with “Write-LogEntry”. Anywhere where a variable’s output is being returned directly to the console I replaced that with “Write-LogObject”. In some cases I added some extra logging and used the “SuppressOutput” flag to specific that this only be written to the log file. With my preferred settings saved using “Save-WriteLogConfig” I could just call “Set-WriteLogconfig” at the beginning of each script file. Settings:

Each script file really just needs to contain 3 lines like this:Set-WriteLogConfig Start-Log -ScriptVersion "1.1" ... Stop-LogEstablish the settings, start the log file (providing a script version is optional), and ultimately stop the log. How many times you use “Write-LogEntry” or “Write-LogObject” within is up to you. Here’s an example of the target folder’s log files:
And the contents of the “Test-Password” log file:
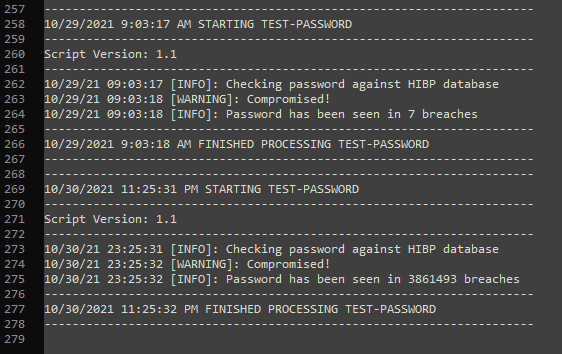
Wrapping up
This is still very much in development, but I have been using it for the last month or so to debug it. There are a lot of great turn-key logging modules already on Github and some of them may work better for you. My intent in writing this module wasn’t to make the most widely consumable logging module for Powershell. I set out to write my first purpose built module, rather than just a collection of things thrown together. I planned to use it for my own purposes but hoped that maybe it would find use elsewhere in my organization. If nothing else it was a good thought exercise in how to approach writing a module and I had a lot of fun so far.
-
Logging in Powershell scripts
Everyone has a different use for Powershell. Some people use it for daily administrative tasks at work. Some people are hard at work developing Powershell modules. Personally I find that I use it a lot for administrative work for my own consumption. I may work within an IDE for half the day selectively executing code that I’ve worked on for a given task. When I decide to write a function it’s typically because I’ve found a repetitive task that would be made simpler with a function. My Get-ADPasswordInfo function is a great example of this. It’s probably one of the first functions I ever wrote, and has seen quite a few changes as I’ve learned more. It stemmed from wanting to know when an Active Directory user’s password was set to expire. AD has this information, but stores it in File Time format, which means nothing to any of us. I had searched how to convert this on the internet and for a time just saved the one-liner in a notepad and would copy and paste it as I needed. It didn’t take long to realize this should just be a function. What started as a one-liner is now more than 50 lines, but the result is more or less the same.
On this particular function I don’t really need to know what it’s doing line by line as it processes, or be able to refer to a log file after the fact. Sometimes if I’m troubleshooting why a loop isn’t working as expected I will iterate through it line by line, and manually check the contents of variables as I go. Or I might temporarily add some Write-Host statements to make things more visible. However, if I’m writing a script that will be ran unattended, or I’m providing it to someone else for their use, I will include more console output as well as some kind of text log file. If you search Github you can find a lot of good logging functions that people have written. I don’t claim that mine is any better than any of these, but it may include something you will find useful.
Output
As the simplest example I will often use Write-Host with colors to display information as the script progresses. Consider this simple function:
Function Start-SleepUntil {
    Param(
    [Parameter(Mandatory=$true,Position=0)]
    [DateTime]$Time
    )
    $CurrentTime = Get-Date
    $Duration = ($Time - $CurrentTime).TotalSeconds
    Start-Sleep -Seconds $Duration
}
Instead of providing the Start-Sleep cmdlet with the number of seconds you want to sleep you can provide this function with the desired end time of the sleep and it will do the math for you. However, when executed It tells you nothing:

Maybe it would be nice to have some of that information output on the console.Function Start-SleepUntil { Param( [Parameter(Mandatory=$true,Position=0)] [Alias('EndTime','Stop')] [datetime]$Time ) Write-Host "Provided end time: $Time" -ForegroundColor Cyan $CurrentTime = Get-Date Write-Host "Current Time: $CurrentTime" -ForegroundColor Yellow $Duration = ($Time - $CurrentTime).TotalSeconds Write-Host "Starting sleep for $Duration seconds" -ForegroundColor Red Start-Sleep -Seconds $Duration }This gives you a little bit more information about what’s going on behind the scenes:

You could also swap the Write-Host statements for Write-Verbose statements and then people could use the common parameter “-Verbose” to see the message:

Output to a file
Sometimes for auditing purposes it can be nice to have common output saved to a file. Let’s consider the same silly example from above but in addition to providing console output we’re also going to save that information to a file.
Function Start-SleepUntil {
    Param(
    [Parameter(Mandatory=$true,Position=0)]
    [Alias('EndTime','Stop')]
    [datetime]$Time
    )
    $LogFile = "C:\Users\Courtney Bodett\Temp\Logfile.txt"
    Write-Host "Provided end time: $Time" -ForegroundColor Cyan
    Add-Content -Path $LogFile -Value "Provided end time: $Time"
    $CurrentTime = Get-Date
    Write-Host "Current Time: $CurrentTime" -ForegroundColor Yellow
    Add-Content -Path $LogFile -Value "Current Time: $CurrentTime"
    $Duration = ($Time - $CurrentTime).TotalSeconds
    Write-Host "Starting sleep for $Duration seconds" -ForegroundColor Red
    Add-Content -Path $LogFile -Value "Starting sleep for $Duration seconds"
    Start-Sleep -Seconds $Duration
}
The output from the function still looks the same, but now there is also a record of it in a text file. The Add-Content cmdlet will append to the specified file so it can be used repeatedly without overwriting existing information. Unfortunately though we had to add two lines each time we wanted to print some information and it’s starting to get tedious.Enter the logging function
As I mentioned before, there are a lot of good examples of logging functions on Github, but I wrote one that was well suited to the environment I work in. At its simplest it just needs to shorten the amount of time it takes to include logging in your script. If you have to provide the path to the logfile every time you want to log something it could get pretty annoying. Since this is going to be a running logfile that input is appended to it would also be good to have timestamps next to everything that’s added. It might start something like this:
Function Write-LogMessage {
    [Alias("LogMsg")]
    Param(
        [Parameter(Position = 0, ValueFromPipeline ,Mandatory=$false)]
        $Msg
    )
    $Destination = "C:\Users\Courtney Bodett\Temp\LogFile.txt"
    $Timestamp = (Get-Date).ToString() + " - "
    Add-Content -Path $Destination -Value ($Timestamp + $Msg)
}
We start off with an appropriate Powershell verb-noun combo but notice I include an alias statement right after the definition. This will allow me to call the function via the short alias rather than the long name. If we use it in our previous example it would look like this:
Function Start-SleepUntil {
    Param(
    [Parameter(Mandatory=$true,Position=0)]
    [Alias('EndTime','Stop')]
    [datetime]$Time
    )
    $LogFile = "C:\Users\Courtney Bodett\Temp\Logfile.txt"
    Write-Host "Provided end time: $Time" -ForegroundColor Cyan
    LogMsg "Provided end time: $Time"
    $CurrentTime = Get-Date
    Write-Host "Current Time: $CurrentTime" -ForegroundColor Yellow
    LogMsg "Current Time: $CurrentTime"
    $Duration = ($Time - $CurrentTime).TotalSeconds
    Write-Host "Starting sleep for $Duration seconds" -ForegroundColor Red
    LogMsg "Starting sleep for $Duration seconds"
    Start-Sleep -Seconds $Duration
}
With the new logging function in place in addition to the existing Write-Host statements you can see that the output looks the same, but when looking at the log file our latest 3 entries have timestamps in front of them:
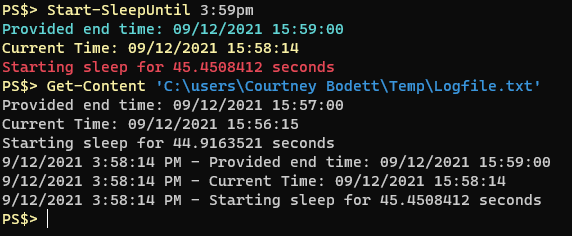
After that it can be nice to add the ability to add a “line” to the file as a separator, or maybe a header when you start logging a new invocation of something just to make things easier to read. For my environment I wanted to be able to use this function in all scripts and dictate per script where the log file would be located as well as specify whether logging to a network location would be included. Then to save time when writing scripts allow the logging function to also output to console if needed. At the beginning of each script specify the following three variables that will then be used by the logging function:$Logfile = "C:\Users\Courtney Bodett\Temp\LogFile.txt" $ServerLogfile = "\\NAS\Logging\Logfile.txt" $LogMsgOutput = $trueWhen looking at the Get-Help info for the Add-Content cmdlet I found that the -Path parameter will actually accept an array of values. The logging function can then write to either a single local location, or the local location and the network location without having to include extra lines. We just need to set up our destinations beforehand. An If statement is then used to control whether or not console output is preferred. The whole function looks something like this:
Function Write-LogMessage {
    [Alias("LogMsg")]
    Param(
        [cmdletbinding()]
        [Parameter(Position = 0, ValueFromPipeline ,Mandatory=$false)]
        $Msg,
        [Switch]$Line,
        [String]$Head,
        [ValidateSet("Continue","SilentlyContinue")]
        [Alias("EAO")]
        $EAOverride = "SilentlyContinue"
    )

    Begin {
        $Destination = @()
        If (!($LogFile)){
            $LogFile = "C:\Temp\Logfile"
        }
        If ($ServerLogFile){
            $Destination += $ServerLogFile
        }

        $Destination += $LogFile
        $Separator = "-"*70
        $Timestamp = (Get-Date).ToString() + " - "
        $ErrorActionPreference = $EAOverride
    }

    Process {
        switch ($PSBoundParameters.keys) {
            'Line' {
                Add-Content -Path $Destination -Value $Separator
                If ($LogMsgOutput){
                    Write-Output $Separator
                }
            }
            'Head' {
                $OutputValue = @($Separator,($Timestamp + $Head.ToUpper()),$Separator)
                Add-Content -Path $Destination -Value $OutputValue
                If ($LogMsgOutput){
                    Write-Output $OutputValue
                }
            }
            'Msg' {
                Add-Content -Path $Destination -Value ($Timestamp + $Msg)
                If ($LogMsgOutput){
                    Write-Output ($Timestamp + $Msg)
                }
            }
        }
    }
}
Our simple Start-SleepUntil function can now use just a single instance of LogMsg and output to the console as well as log to one or many destinations.
Function Start-SleepUntil {
    Param(
    [Parameter(Mandatory=$true,Position=0)]
    [Alias('EndTime','Stop')]
    [datetime]$Time
    )
    $LogFile = "C:\Users\Courtney Bodett\Temp\Logfile.txt"
    $LogMsgOutput = $true
    LogMsg "Provided end time: $Time" -Head "Start-SleepUntil"
    $CurrentTime = Get-Date
    LogMsg "Current Time: $CurrentTime"
    $Duration = ($Time - $CurrentTime).TotalSeconds
    LogMsg "Starting sleep for $Duration seconds"
    Start-Sleep -Seconds $Duration
}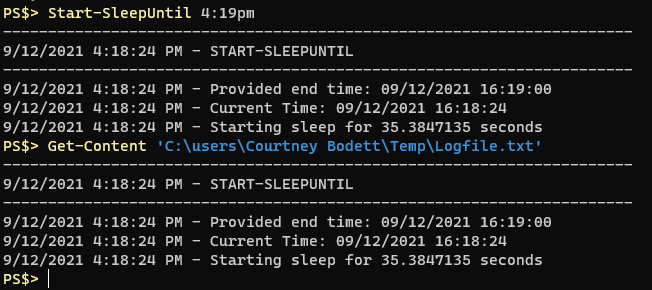
As you can see from the output the text displayed in the console matches what gets logged.Conclusion
I encourage everyone to include some form of console output or logging to a file if you’re writing scripts that will run unattended or be consumed by other business areas. It can be immensely helpful when diagnosing errors or trying to understand why the output isn’t as desired. This is just one example of many, but I hope that serves as a good example of the value-add that can come from decent logging.
-
Parsing log files with Powershell
Early on when I first started using Powershell I was dealing with some firewall logs from a perimeter firewall. They were exported from a SIEM in CSV format, which I appreciated, but the format within was odd and not condusive to what I was trying to do. I was having a hard time wrapping my mind around how to deal with them in Powershell and some helpful person on Stackoverflow suggested I use regex to match each row, capture a value, and when the last row of a particular entry was matched, spit out a PSCustomObject with all the property/value pairs I wanted.
I no longer have an example of this data handy but I can replicate something similar:
Now you can see the issue. The way the SIEM exported the data I actually needed 3 consecutive rows to represent a single query output. What I wanted was a single row with all of that data on it in a spreadsheet. The advice I was given was to iterate through each row in the CSV, and use Regex with a capture group for each row to grab the data I wanted and store it in a variable. Then on the last row after matching with Regex, also return a PSCustomObject with all the values I had collected. Something a little like this:
$RE1 = '^(?<IpDst>(\d{1,3}\.){3}\d{1,3}),'
$RE2 = '\s*ip\.dstport\s*(?<IpDstPort>\d+)'
$RE3 = '\s*ip\.src\s*(?<IpSrc>(\d{1,3}.){3}\d{1,3}),\s*(?<Sessions>\d+)'

$Data = Get-Content $CSVpath | ForEach-Object {
    If($_ -match $RE1){$IpDst = $Matches.IpDst}
    If($_ -match $RE2){$IpDstPort = $Matches.IpDstPort}
    If($_ -match $RE3){
        [PSCustomObject]@{
            'DestIP'        = $IpDst
            'DestPort'    = $IpDstPort
            'SrcIP'        = $Matches.IpSrc
            'Session_count' = $Matches.Sessions
        }
    }
}
The resulting output for a single entry would look like this:

If the first three Regex statements look a little intimidating I would highly recommend checking out Regex101.com. It’s a great way to write and test regex statements in real time against data you provide. Each Regex statement above is stored in a corresponding variable with the intent being to match against the first row of one of my intended entries, then the second, and lastly the third. Upon matching the 3rd and final row of an entry it returns a PSCustomObject with the property names of my choosing, and the values I’ve captured. Again, this was suggested to me by another user on Stackoverflow but I loved the logic of it, and it absolutely worked for what I was doing.Fast forward to the last month and a user on Reddit asked a similar question to what I did when I first encountered this. I happily provided the above answer, but decided to dig a little deeper on my own. This user had some McAfee ENS firewall logs they wanted to parse. Having dealt with these logs before I know they can get quite big, and even trying to do “Find and Mark” in Notepad++ can sometimes cause the program to stop responding because there’s so many rows in the text file. Come to think of it, I don’t know why I never thought to use Powershell to try to deal with these.
The user provided a redacted sampling of what a McAfee ENS log entry looks like:
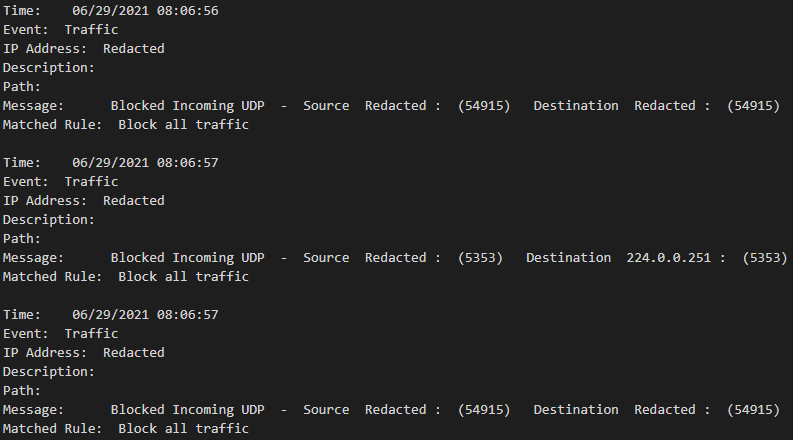
Using the same logic before we can see that 7 rows represent a complete log entry. Starting with the “Time:” row and ending with the “Matched Rule:” row. We just need to build our Regex for each row, with capture groups to pull the data we want, then on the last matched row return a PSCustomObject.
Regex:$RETime = '^Time:\s+(?<Time>.*)' $REEvent = '^Event:\s+(?<Event>.*)' $REIP = '^IP Address:\s+(?<IP>.*)' $REDescription = '^Description:\s+(?<Description>.*)' $REPath = '^Path:\s+(?<Path>.*)' $REMessage = '^Message:\s+(?<Message>.*)-\s+Source\s+(?<SrcIP>\S+)\s+\:\s+\((?<SrcPort>\d{1,5})\)\s+Destination\s+(?<DstIP>\S+)\s+\:\s+\((?<DstPort>\d{1,5})\)' $RERule = '^Matched Rule:\s+(?<Rule>.*)'Then we could do something similar to before and get PSCustomObjects saved in an array
$Log = Get-Content C:\scripts\Testing\ENSlog.txt

$Results = Foreach ($Line in $Log){
    If ($Line -match $RETime){$Time = $Matches.Time}
    If ($Line -match $REEvent){$Event1 = $Matches.Event}
    If ($Line -match $REIP){$IP = $Matches.IP}
    If ($Line -match $REDescription){$Description = $Matches.Description}
    If ($Line -match $REPath){$Path = $Matches.Path}
    If ($Line -match $REMessage){
        $Message = $Matches.Message
        $SrcIP = $Matches.SrcIP
        $SrcPort = $Matches.SrcPort
        $DstIP = $Matches.DstIP
        $DstPort = $Matches.DstPort
    }
    If ($Line -match $RERule){
        [PSCustomObject]@{
            Time = $Time
            Event = $Event1
            IP = $IP
            Description = $Description
            Path = $Path
            Message = $Message
            SourceIP = $SrcIP
            SourcePort = $SrcPort
            DestinationIP = $DstIP
            DestinationPort = $DstPort
            Rule = $Matches.Rule
        }
    }
}
Output for the 3 log entries shown above would instead look like this:
Time            : 06/29/2021 08:06:56
Event           : Traffic
IP              : Redacted
Description     :
Path            :
Message         : Blocked Incoming UDP
SourceIP        : Redacted
SourcePort      : 54915
DestinationIP   : Redacted
DestinationPort : 54915
Rule            : Block all traffic

Time            : 06/29/2021 08:06:57
Event           : Traffic
IP              : Redacted
Description     :
Path            :
Message         : Blocked Incoming UDP
SourceIP        : Redacted
SourcePort      : 5353
DestinationIP   : 224.0.0.251
DestinationPort : 5353
Rule            : Block all traffic

Time            : 06/29/2021 08:06:57
Event           : Traffic
IP              : Redacted
Description     :
Path            :
Message         : Blocked Incoming UDP
SourceIP        : Redacted
SourcePort      : 54915
DestinationIP   : Redacted
DestinationPort : 54915
Rule            : Block all traffic
I realize this looks pretty similar, but if you pipe the output to Format-Table it changes the way you can look at these logs significantly:
Time                 Event    IP       Description Path Message                SourceIP SourcePort DestinationIP DestinationPort
----                 -----    --       ----------- ---- -------                -------- ---------- ------------- ---------------
06/29/2021 08:06:56  Traffic  Redacted                  Blocked Incoming UDP   Redacted 54915      Redacted      54915
06/29/2021 08:06:57  Traffic  Redacted                  Blocked Incoming UDP   Redacted 5353       224.0.0.251   5353
06/29/2021 08:06:57  Traffic  Redacted                  Blocked Incoming UDP   Redacted 54915      Redacted      54915
In real-world examples where “Description” and “Path” have values it would likely push the table off the viewable screen, but now that our logs are objects with properties we can take advantage of Where-Object to help us filter:
$Results | Where-Object {$_.DestinationPort -eq "5353"} | Select-Object SourceIP,DestinationIP,DestinationPort

SourceIP DestinationIP DestinationPort
-------- ------------- ---------------
Redacted 224.0.0.251   5353
Redacted 224.0.0.251   5353
Redacted 224.0.0.251   5353
...
Let’s speed it up
This worked pretty well for the small sampling the user provided, but then I remembered just how painfully big those ENS text files could get and I wondered if there wasn’t a faster way than all of those “if” statements. After a little bit of searching I found someone mention that you could actually specify a text file with the Switch command and use a switch block to process all the regex patterns. Same Regex patterns as before, just swapping out how the text is processed:
$Results = switch -regex -file C:\scripts\Testing\ENSlog.txt {
    $RETime {$Time = $Matches.Time}
    $REEvent {$Event1 = $Matches.Event}
    $REIP {$IP = $Matches.IP}
    $REDescription {$Description = $Matches.Description}
    $REPath {$Path = $Matches.Path}
    $REMessage {
        $Message = $Matches.Message
        $SrcIP = $Matches.SrcIP
        $SrcPort = $Matches.SrcPort
        $DstIP = $Matches.DstIP
        $DstPort = $Matches.DstPort
    }
    $RERule {
        [PSCustomObject]@{
            Time = $Time
            Event = $Event1
            IP = $IP
            Description = $Description
            Path = $Path
            Message = $Message
            SourceIP = $SrcIP
            SourcePort = $SrcPort
            DestinationIP = $DstIP
            DestinationPort = $DstPort
            Rule = $Matches.Rule
        }
    }
}
In some short examples this proved to be a bit faster (in milliseconds) than the previous method. I artificially bloated up my sample log file by copying and pasting the data over and over again until I had reached 1,000,000+ lines. The Switch block was definitely faster than the If statements but it was the difference between 4 and a half minutes and 4 minutes. I found a blog post that tested a bunch of different methods for reading text files and they found a .NET method that proved to work nicely. All together now:
Start-Job -ScriptBlock {
$RETime = '^Time:\s+(?<Time>.*)'
$REEvent = '^Event:\s+(?<Event>.*)'
$REIP = '^IP Address:\s+(?<IP>.*)'
$REDescription = '^Description:\s+(?<Description>.*)'
$REPath = '^Path:\s+(?<Path>.*)'
$REMessage = 'Message:\s+(?<Message>.*)-\s+Source\s+(?<SrcIP>\S+)\s+\:\s+\((?<SrcPort>\d{1,5})\)\s+Destination\s+(?<DstIP>\S+)\s+\:\s+\((?<DstPort>\d{1,5})\)'
$RERule = '^Matched Rule:\s+(?<Rule>.*)'
$Results = Switch -Regex ([system.io.file]::readlines('C:\scripts\testing\ENSlog.txt')){
    $RETime {$Time = $Matches.Time}
    $REEvent {$Event1 = $Matches.Event}
    $REIP {$IP = $Matches.IP}
    $REDescription {$Description = $Matches.Description}
    $REPath {$Path = $Matches.Path}
    $REMessage {
        $Message = $Matches.Message
        $SrcIP = $Matches.SrcIP
        $SrcPort = $Matches.SrcPort
        $DstIP = $Matches.DstIP
        $DstPort = $Matches.DstPort
    }
    $RERule {
        [PSCustomObject]@{
            Time = $Time
            Event = $Event1
            IP = $IP
            Description = $Description
            Path = $Path
            Message = $Message
            SourceIP = $SrcIP
            SourcePort = $SrcPort
            DestinationIP = $DstIP
            DestinationPort = $DstPort
            Rule = $Matches.Rule
        }
    }
}

$Results

} -Name 'ensjob'
Do {
    $anim=@("|","/","-","\","|")
    $anim | % {
        write-host "`r$_" -NoNewline -ForegroundColor Yellow
        start-sleep -m 75
        }
} While ((Get-Job 'ensjob').state -eq 'Running')
$job = Receive-Job -name 'ensjob'
$job
You’ll notice I wrapped it in a Start-Job because, despite the performance increase of the .NET method over Get-Content, processing a million lines of text still seems to take upwards of a minute depending on the circumstances. If it’s running as a job then I can create a nice little Do/While loop to provide an animation to watch so I at least feel like something is happening.
This is all still based on a Reddit user’s provided log example. I will have to get my hands on some real logs to do some more testing, but if the performance is there I can envision a Powershell module for dealing with ENS logs. I will have to update this post more in the future as I learn more. For now, just take it as an example that Regex and Powershell together can help with processing log files in a variety of formats.
-
Get-Connections; netstat for Powershell
One of the tools I feel like I’ve been using for years is Netstat. It exists in both Linux and Windows (with some differences) and has similar syntax. It’s often helpful for determining if you’ve got a service listening on the port you expect, or if you’re really making that outbound connection that the GUI says you are. In security it was helpful for these same reasons. One of the places I would look for Indicators Of Compromise (IOC) was within netstat. At one job I was beginning to use Powershell constantly for remote inspection of hosts, or even remediation, and I was curious what the Powershell alternative for netstat was. Something object oriented so I could better control the output.
Get-NetTCPConnection has entered the chat:
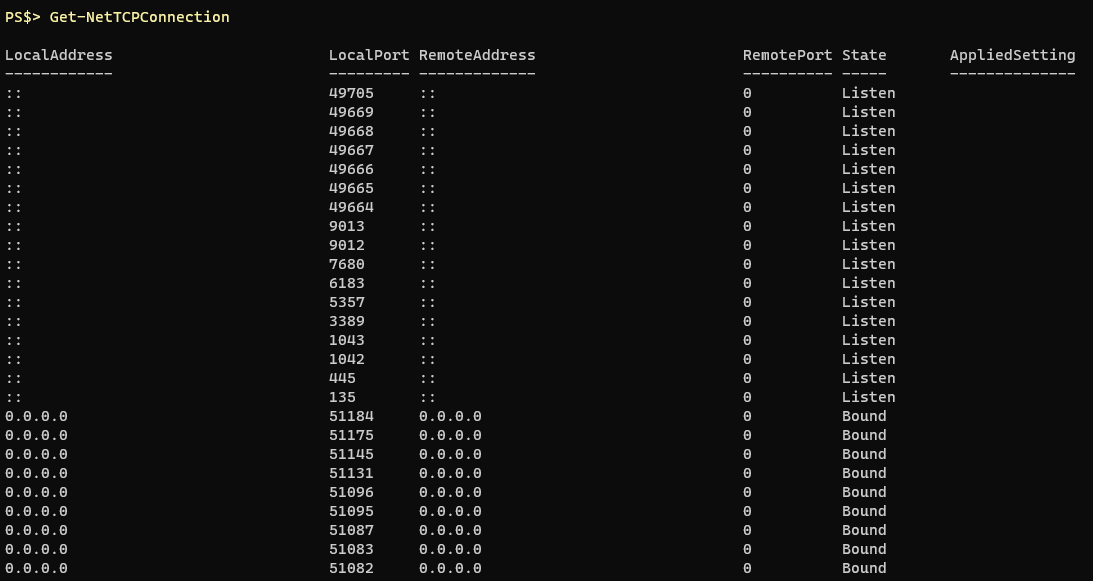
It has a lot of the same functionality as netstat just a little more long winded on the syntax side:Get-NetTCPConnection -State ListenRunning this will return all of my listening connections. One of the things I was always interested in when searching for IOCs is which process did that state belong to. If there’s an active listening state running on port 4444 it’d be nice to know if that’s a Metasploit process or McAfee.
Even more long winded, but you can include the owning process ID in the results:

The process ID is great, but I’d like a human readable name:

Wow. That’s even worse, and there’s no way I’m going to remember all of that. I’m leveraging a technique that works with Format-Table, Format-List and Select-Ojbect (maybe others?) where you can customize a property you want returned by supplying a hashtable where the Key is the name you would like to give this property and the value is an expression, often more Powershell ran against the current object in the pipeline. In the above example I do this twice, both times using the OwningProcess ID number from Get-NetTCPConnection and passing it to the Get-Process cmdlet. The first time I retrieve just the ProcessName property and the second time I execute Get-Process with the “-IncludeUserName” parameter and retrieve that value. The last part only works if you’re running your session as administrator, if not it’ll just return an empty value for that property.To make our request a little bit easier to look at we could use a technique called splatting that I like:
$SelObjArgs = [ordered]@{
    Property = @("Local*",
                "Remote*",
                "State",
                @{Name="Process";Expression={(Get-Process -Id $_.OwningProcess).ProcessName}},
                @{Name="User";Expression={(Get-Process -Id $_.owningprocess -IncludeUserName).Username}}
    )
}
I know I want to pass the “-Property” parameter to Select-Object and then supply an array of properties that I wanted returned. So I make an ordered hashtable that really only contains one key/value pair. The key is “Property” (or any parameter you want to use this technique with). The value is then an array of properties I want, and for ease of reading I put a line break after each item. Then when you want to call this variable instead of prepending a
$you use an@. Then it kind of “splats” the list of parameter/value pairs you’ve put in your hash table.
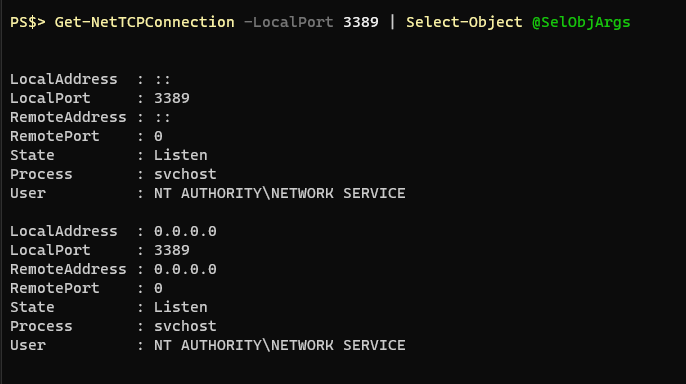
To fix the output and make it look like a table again we just need to pipe it to Format-Table:
That’s pretty much it. We could just wrap that in a Function declaration and we’d be good, but the more I used this new function the more I realized it’d be nice to do some filtering when you first call Get-NetTCPConnection, rather than storing the results in a variable and then filtering them with a Where-Object after. Just like in the examples I’ve been showing I’ve been focusing on just local port 3389. I crafted a parameter block for the function and a switchblock to deal with the parameters.
Param:Param( [Parameter(Mandatory=$false)] [ValidateSet("LocalAddress","LocalPort","RemoteAddress","RemotePort","State","Process","User")] $Sort = "State", [Parameter(ParameterSetName = "Filter", Mandatory=$false)] $LocalAddress = $null, [Parameter(ParameterSetName = "Filter", Mandatory=$false)] $LocalPort = $null, [Parameter(ParameterSetName = "Filter", Mandatory=$false)] $RemoteAddress = $null, [Parameter(ParameterSetName = "Filter", Mandatory=$false)] $RemotePort = $null, [Parameter(ParameterSetName = "Filter", Mandatory=$false)] [ValidateSet("Listen","Bound","Established","CloseWait","Timewait")] $State = $null )Switchblock:
$GNTCArgs = [ordered]@{}

If ($PSCmdlet.ParameterSetName -eq "Filter"){
    Switch ($PSCmdlet.MyInvocation.BoundParameters.keys) {
        'LocalAddress' {$GNTCArgs.Add('LocalAddress',$LocalAddress)}
        'LocalPort' {$GNTCArgs.Add('LocalPort',$LocalPort)}
        'RemoteAddress' {$GNTCArgs.Add('RemoteAddress',$RemoteAddress)}
        'RemotePort' {$GNTCArgs.Add('RemotePort',$RemotePort)}
        'State' {$GNTCArgs.Add('State',$State)}
    }
}
Forgive the abbreviations. Let’s start at the top. The first parameter, “Sort”, accepts the property names that would commonly be returned by this function. It’s used later with Sort-Object to allow you to control the sort at function execution. The rest of the parameters as you move down allow you to filter on certain properties based on a value you provide. If any of these parameters are specified the “If” statement before the switchblock is triggered and the switchblock will process each parameter by name. Just prior to the switchblock I initiate an empty ordered hashtable. The switchblock adds the parameter/property name and the user supplied value to the hashtable. This way, just like we splatted a hashtable to the Select-Object cmdlet we can splat our “filter” arguments to the Get-NetTCPConnection cmdlet. The function might look something like this:
Function Get-Connections {
[CmdletBinding()]
Param(
    [Parameter(Mandatory=$false)]
    [ValidateSet("LocalAddress","LocalPort","RemoteAddress","RemotePort","State","Process","User")]
    $Sort = "State",
    [Parameter(ParameterSetName = "Filter", Mandatory=$false)]
    $LocalAddress = $null,
    [Parameter(ParameterSetName = "Filter", Mandatory=$false)]
    $LocalPort = $null,
    [Parameter(ParameterSetName = "Filter", Mandatory=$false)]
    $RemoteAddress = $null,
    [Parameter(ParameterSetName = "Filter", Mandatory=$false)]
    $RemotePort = $null,
    [Parameter(ParameterSetName = "Filter", Mandatory=$false)]
    [ValidateSet("Listen","Bound","Established","CloseWait","Timewait")]
    $State = $null
)

Begin {
    $GNTCArgs = [ordered]@{}

    If ($PSCmdlet.ParameterSetName -eq "Filter"){
        Switch ($PSCmdlet.MyInvocation.BoundParameters.keys) {
            'LocalAddress' {$GNTCArgs.Add('LocalAddress',$LocalAddress)}
            'LocalPort' {$GNTCArgs.Add('LocalPort',$LocalPort)}
            'RemoteAddress' {$GNTCArgs.Add('RemoteAddress',$RemoteAddress)}
            'RemotePort' {$GNTCArgs.Add('RemotePort',$RemotePort)}
            'State' {$GNTCArgs.Add('State',$State)}
        }
    }

    $SelObjArgs = [ordered]@{
        Property = @("Local*",
                    "Remote*",
                    "State",
                    @{Name="Process";Expression={(Get-Process -Id $_.OwningProcess).ProcessName}},
                    @{Name="User";Expression={(Get-Process -Id $_.owningprocess -IncludeUserName).Username}}
        )
    }
}# end Begin block


Process {
    $Results = Try {
        Get-NetTCPConnection @GNTCArgs -ErrorAction Stop | Select-Object @SelObjArgs
        } Catch [Microsoft.PowerShell.Cmdletization.Cim.CimJobException] {
            Throw "Could not find any states matching that parameter"
        } Catch {
            $Error[0].Exception
        }
    $Results | Sort-Object -Property $Sort | Format-Table -AutoSize -Wrap
}# end Process block


End {
}
} #end of Get-Connections
And finally, some examples: Revisiting the port 3389 example we’ve been seeing

Maybe you’re only interested if there’s a connection to a particular destination IP:

While not revolutionary or groundbreaking Get-Connections is a great example of how you can shape Powershell to better help you in your every day tasks. It’s also a good evolution of how I’ve come to embrace hashtables, splatting, and switchblocks in my Powershell.
-
Secure Credentials in Powershell
A coworker from a neighboring department had an interesting request one day. They wanted a scheduled task to run on a server. Through whatever mechanism the task would look in a series of folders for PDF files. If it found PDFs it would then FTP upload them and when complete move the files to an archive server for safe keeping. A good job for Powershell with a lot of fun components to it but I want to focus on one aspect: how to save the FTP credentials in the script securely. At some point everyone has probably come across this in a script somewhere:
$Username = "Admin"
$Password = "MySecretPassword"
This wouldn’t fly here. Typically I would handle this by having the script prompt the user for the credential at the execution of the script using Get-Credential:
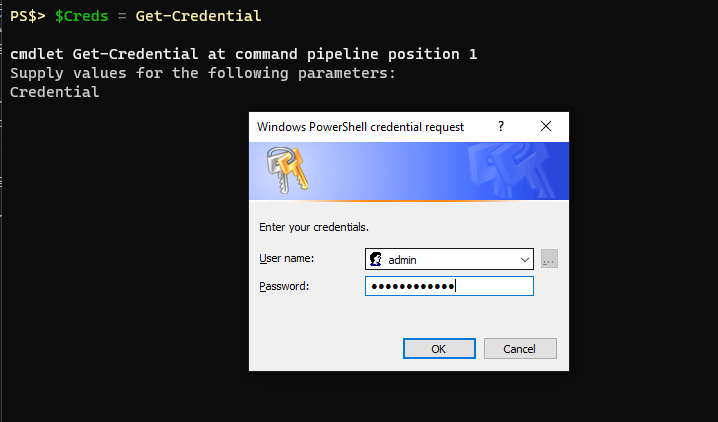
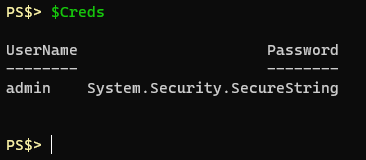
The value for the provided password is then stored in that object as a SecureString. It can then be safely used throughout the script during execution and is cleared when the script ends. If you want to save a SecureString to a file for use later you need to convert the object from a SecureString using ConvertFrom-SecureString. I recommend reading Microsoft’s documentation about the ConvertFrom and ConvertTo SecureString cmdlets.
ConvertFrom-SecureString
ConvertTo-SecureString
By default ConvertFrom-SecureString will use the Windows Data Protection API (DPAPI) to encrypt the standard string contents, which looks like this:

What’s convenient, and secure, about the use of DPAPI with ConvertFrom-SecureString is that the encryption key is derived from the current user on the current machine. This means that if I saved that string to a file only my user account on that computer would be able to convert it back in to a SecureString object and use it in a script. If your account got hacked then an attacker could reveal the plain text content of these saved SecureStrings.
My first thought was that there should be a dedicated service account for use with this Scheduled Task. It would have no logon rights and a very complex secure password. This account, on the intended server/computer, would then be the one to take the FTP credentials, convert them from a SecureString and save them to a file for later use. This way, any other administrator of that server would just see encrypted junk in the file and no amount of Powershell-fu could reveal it to them.
The Powershell to collect the credentials and save them to a file is pretty simple:$FTPCreds = Get-Credential -Message "Provide credentials for FTP connection"It will then pop up the standard Get-Credential GUI prompt. Fill out the fields and hit enter. Now we’ll use a cmdlet called “Export-Clixml” to save the entire PScredential object to a file for ease of importation later.
$FTPCreds | Export-Clixml "C:\Users\Courtney\Documents\FTPCreds.xml"If you look at this XML file in a text editor you can see that this cmdlet saves what type of Powershell object it is and contains both object properties: UserName and Password. You can see the password is a DPAPI encrypted string.

Using the companion cmdlet Import-Clixml you can easily create a PScredential object with these saved credentials.

Now we have the mechanics we need to capture credentials, save them to a file and import those credentials to Powershell all securely. The trick is, we need the service account that will be running this script to store the credentials for import later. That’s tricky because I already said this service account won’t have logon rights to the server. We need a script just for saving these credentials it turns out. A server administrator should be able to launch this script and provide the FTP credentials to then be saved to an XML file and that process has to be done as our service account user. There may be another way to do this but I decided to use the “-Credential” parameter of the “Start-Job” cmdlet to execute a script block as the service account. Observe the behavior here:

First I run “whoami” so you can see the session is running under my account then I start a job that executes “whoami” as part of the script block and lastly I provide the “-Credential” parameter and specify a different user account (FTPuser). I receive the job, which would be the output of the executed “whoami” script block and as you can see it returned the username “FTPuser”.
The workflow would then be:- Administrator launches script
- Administrator is prompted for service account credentials
- Administrator is prompted for FTP credentials they wish to save
- XML file it outputted with the saved credentials
-
Get-ADPasswordInfo
When I first started getting in to Powershell I was working in an IT Security position and was sifting through a lot of “noise” in the SIEM alerts. The main offender was account lockouts. Typically, if I looked up the user in Active Directory I’d find out that they had recently changed their password, and so it wasn’t anomalous behavior for them to have locked their account. But, getting this information from the AD/UC snapin was very slow, and some of the information was more easily gleaned through Powershell. One of the Sys Admins had given me a script they wrote that kind of did what I wanted, but I decided to write my own.
Running the following command got me to a good starting place:
Get-ADuser -Identity JohnSmith -Properties * | Select-Object *This gave me all of the possible properties a user object from AD might contain and what their values were. A little bit of searching and I had my list of properties I wanted to query for a specific user.
Get-ADuser -Identity JohnSmith -Properties Displayname,Passwordlastset,Badpasswordtime,msDS-userpasswordexpirytimecomputed,lockedout,accountlockouttime,LastBadPasswordAttemptThat’s kind of long to look at and as it turns out, the value stored within “msDS-userpasswordexpirytimecomputed” isn’t very friendly so you need to convert it to something more human readable:
Get-ADuser -Identity JohnSmith -Properties Displayname,Passwordlastset,Badpasswordtime,msDS-userpasswordexpirytimecomputed,lockedout,accountlockouttime,LastBadPasswordAttempt | Select-Object @{Name="ExpiryDate";Expression={[datetime]::fromfiletime($_."msds-userpasswordexpirytimecomputed")}}Great, not it’s even longer. Obviously there’s no way I’m going to remember all of that every time I want to get this information, so this is a perfect opportunity for a Powershell function. When I have a lot of object properties to deal with I like to set up hashtables so I can splat them at the cmdlet.
$GetADUserArgs = [ordered]@{
    Identity = $User
    Server = $Server
    Properties = @(
        'Displayname',
        'Passwordlastset',
        'Badpasswordtime',
        'msDS-userpasswordexpirytimecomputed',
        'lockedout',
        'accountlockouttime',
        'LastBadPasswordAttempt')
}
I’ve got 3 parameters for the Get-ADuser cmdlet I want to provide values for and one of them (Properties) I’ve got 7 values to provide. Creating this ahead of time in the above format makes it much easier to read and better for the next person who comes along to edit it. I also need to convert that one time property to a human readable version in a Select-Object statement so I might as well set up a similar block for that.
$SelObjArgs = [ordered]@{
    Property = @("Displayname",
                "Passwordlastset",
                @{Name="ExpiryDate";Expression={[datetime]::fromfiletime($_."msds-userpasswordexpirytimecomputed")}},
                "Lockedout",
                @{Name="LockoutTime";Expression={ $_.accountlockouttime }},
                @{Name="LastFailedAuth";Expression={ $_.lastbadpasswordattempt}}
    )
}
The last two are just to rename the properties “AccountLockoutTime” and “LastBadPasswordAttempt” so that my results are a little shorter and easier to look at. With those two variables defined my cmdlet execution get’s to look pretty concise.
Get-ADUser @GetADUserArgs | Select-Object @SelObjArgsNow we just need to build the function around this and we’re almost there
Function Get-ADPasswordInfo {
    Param(
    [cmdletbinding()]
    [Parameter(Position = 0, ValueFromPipeline,Mandatory=$true)]
    [Alias('Username')]
    $User,
    [string]$Server = 'contoso.com' #put your AD domain here

)

Begin {
    # stuff to set up before processing the request

    # check to make sure the AD module is loaded

    if (!(Get-module -name ActiveDirectory)){
        Import-Module -Name ActiveDirectory
    }
    # define our 'select-object' properties to make the command easier to read down below

    $SelObjArgs = [ordered]@{
        Property = @("Displayname",
                    "Passwordlastset",
                    @{Name="ExpiryDate";Expression={[datetime]::fromfiletime($_."msds-userpasswordexpirytimecomputed")}},
                    "Lockedout",
                    @{Name="LockoutTime";Expression={ $_.accountlockouttime }},
                    @{Name="LastFailedAuth";Expression={ $_.lastbadpasswordattempt}}
        )
    }
    # an array to store our results in

    $results = @()
} # end Begin block


Process {
    # our command parameters, defined ahead of time for easier reading down below. This needs to be in the 'process' block so that the $user variable can be defined/updated from pipelineinput

    $GetADUserArgs = [ordered]@{
        Identity = $User
        Server = $server
        Properties = @('Displayname','Passwordlastset','Badpasswordtime','msDS-userpasswordexpirytimecomputed','lockedout','accountlockouttime','LastBadPasswordAttempt')
    }
    # do the query and then append the info to the results array

    Try{
        $adinfo = Get-ADUser @GetADUserArgs -ErrorAction SilentlyContinue | Select-Object  @SelObjArgs
    }Catch [Microsoft.ActiveDirectory.Management.ADIdentityNotFoundException]{
        Write-Host "$User not found in domain: $Server" -ForegroundColor Yellow
    }Catch{
        $Error[0].Exception
    }
    $results+=$adinfo
} # end Process block


End {
    $Results | Format-Table
} # end of End block

} # end of function
I omitted the Get-Help info at the top, but I always recommend writing this so other people can understand how to use your code. Execution of this function might look something like this.
Get-ADPasswordInfo -User cbodett
Displayname            Passwordlastset      ExpiryDate           Lockedout LockoutTime LastFailedAuth
-----------            ---------------      ----------           --------- ----------- --------------
Bodett, Courtney        2/13/2020 3:44:03 PM 4/13/2020 4:44:03 PM     False             3/16/2020 7:16:02 AM
Since it’s an advanced function it supports pipeline input, and the Begin and Process blocks are built around this idea too. This means you can pipe a bunch of usernames to the function, it will process them all, and then spit out a big table with all of your results. I would often just do this:
Search-ADaccount -Lockedout | Select-Object -Expand samaccountname | Get-ADPasswordInfoThis would get me the pertinent password information about every account that was currently locked out. A quick glance at when their password expired and when they last changed it would usually let me know whether or not this required much further investigation.
-
Jekyll & Minimal Mistakes; Done
“Hello World” and all that. What started as a small conversation turned in to an Idea that I couldn’t shake: I wanted a blog. But I didn’t want a WordPress blog, having spent too much time scanning WordPress sites for vulnerabilities and always coming up with something I didn’t want to be in the same boat. The idea of static site generation sure sounded like what I wanted and the name “Jekyll” was coming up a lot. I actually use a project called Joplin for note taking and it uses Markdown, and when I saw that Jekyll was based on Markdown it seemed like a good opportunity to get proficient. Couple in free hosting on Github and I’m sold. So here I am typing out my first blog post using Vi, fingers crossed that when I push it to Github it will look like I expect. Soon to come are posts about some of the things I’ve created in Powershell that I found fun and/or useful.